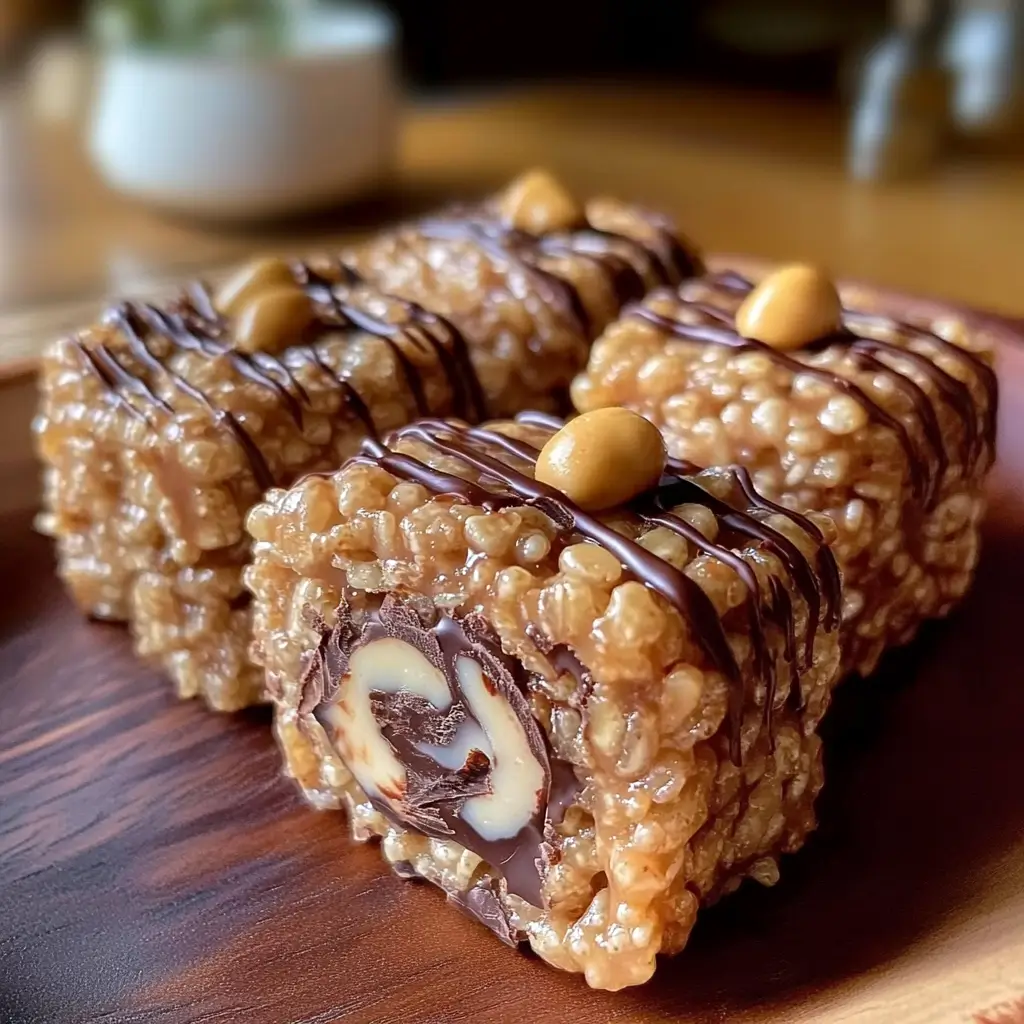
If you’re looking for a dessert that’s easy to make, deliciously indulgent, and sure to impress, look no further than this Chocolate Peanut Butter Rice Krispies Roll. With layers of gooey chocolate, creamy peanut butter, and crispy Rice Krispies, this no-bake treat is an absolute show-stopper. Whether you’re making it for a family gathering, a sweet snack, or a special occasion, this recipe is a crowd-pleaser that combines the best of chocolate and peanut butter in a fun, roll-up style!
Why You’ll Love This Recipe
- No-Bake Simplicity: There’s no oven required for this treat, making it quick and easy to prepare, even for novice bakers.
- Layered Goodness: The combination of crispy Rice Krispies, creamy peanut butter, and smooth chocolate creates the ultimate texture and flavor experience.
- Perfect for Parties: This dessert is great for sharing and can be easily sliced into individual portions. It’s portable, and people love the unique roll-up presentation.
- Customization: You can make this recipe your own by adding extra mix-ins like crushed nuts, mini marshmallows, or even a drizzle of caramel for extra sweetness.
Ingredients
For the Rice Krispies Layer:
- 3 cups Rice Krispies cereal
- 3 cups mini marshmallows
- 1/4 cup unsalted butter
For the Filling:
- 1 cup creamy peanut butter
- 1 cup semi-sweet chocolate chips
Step-by-Step Instructions
Step 1: Make the Rice Krispies Layer
In a large pot, melt the butter over low heat. Add the mini marshmallows and stir constantly until they are fully melted and smooth, creating a gooey marshmallow mixture.
Step 2: Combine with Rice Krispies
Once the marshmallows have melted, remove the pot from heat. Stir in the Rice Krispies cereal, mixing until the cereal is evenly coated in the marshmallow mixture.
Step 3: Spread the Rice Krispies Mixture
Line a flat surface with parchment or wax paper. Spread the Rice Krispies mixture onto the paper, using a spatula to flatten it into a thin, even rectangle. Be sure to press it gently to help it set without becoming too dense.
Step 4: Melt the Peanut Butter and Chocolate
In a microwave-safe bowl, combine the peanut butter and chocolate chips. Microwave in 30-second intervals, stirring after each one, until the mixture is fully melted and smooth. This will create a creamy, luscious filling.
Step 5: Spread the Filling
Once the peanut butter and chocolate mixture is smooth, spread it evenly over the Rice Krispies layer. Use a spatula or spoon to ensure the mixture covers the surface completely.
Step 6: Roll the Rice Krispies Layer
Carefully lift one short side of the parchment or wax paper and begin rolling the Rice Krispies layer tightly into a log shape. Use the paper to help guide the roll and keep it as tight as possible without squeezing too hard.
Step 7: Refrigerate and Firm Up
Once rolled, wrap the log in the wax paper and refrigerate it for at least 1 hour, or until the roll is firm and set. This will make it easier to slice.
Step 8: Slice and Serve
After the roll has set, remove it from the refrigerator. Carefully slice it into 1-inch pieces using a sharp knife. Serve the slices chilled or at room temperature.
Kitchen Equipment Needed
- Large Pot: For melting the marshmallows and butter together.
- Spatula: To stir the Rice Krispies mixture and spread the fillings evenly.
- Microwave-Safe Bowl: For melting the peanut butter and chocolate.
- Parchment or Wax Paper: For rolling and spreading the Rice Krispies mixture.
- Sharp Knife: To slice the roll into individual pieces.
Serving and Storage Tips
- Serving: These treats are perfect for parties or potlucks, and they can also be packed in lunchboxes for a sweet snack. Serve them chilled or at room temperature—either way, they are delicious!
- Storage: Store the sliced rolls in an airtight container in the refrigerator for up to 1 week. If you want to keep them longer, you can freeze the roll for up to 2 months. Just make sure to wrap it tightly in wax paper or plastic wrap before freezing.
Variations
- Add-Ins: Feel free to mix in mini marshmallows, chopped nuts (like peanuts or almonds), or even a handful of chocolate chips to the Rice Krispies layer for extra texture and flavor.
- Peanut Butter Alternatives: You can substitute the creamy peanut butter with almond butter, cashew butter, or sunflower seed butter for a nut-free version.
- Flavored Chocolate: Swap out the semi-sweet chocolate chips for milk chocolate, dark chocolate, or even white chocolate for a different flavor profile.
- Crispy Rice Substitutes: If you don’t have Rice Krispies on hand, you can use other puffed rice cereals or even crushed cornflakes as a substitute.
Helpful Notes
- Pressing the Rice Krispies Layer: When spreading the Rice Krispies mixture, be careful not to press too hard, as it could become too dense. Just gently flatten it to create an even layer.
- Rolling Tips: If the roll is sticking to the wax paper, lightly grease the paper with butter or non-stick spray. This will make the rolling process smoother.
- Microwave Melting: When melting the peanut butter and chocolate, make sure to stop and stir every 30 seconds to prevent overheating and to ensure a smooth consistency.
Tips from Well-Known Chefs
- Alton Brown: “When making no-bake desserts, patience is key. Let the roll chill thoroughly before slicing. This will ensure cleaner cuts and a firmer texture.”
- Ree Drummond: “This treat is a great make-ahead option for gatherings. Just slice and serve—it’s the kind of treat that everyone loves!”
- Martha Stewart: “For extra flavor, consider adding a pinch of sea salt on top before serving. It will elevate the peanut butter and chocolate combination!”
Frequently Asked Questions
1. Can I make this ahead of time?
Yes! You can prepare the roll up to 2 days in advance and keep it refrigerated until ready to serve. This makes it a great option for parties or potlucks.
2. Can I use crunchy peanut butter instead of creamy?
Absolutely! Crunchy peanut butter will add a nice texture to the filling and work perfectly in this dessert.
3. Can I freeze the Chocolate Peanut Butter Rice Krispies Roll?
Yes, you can freeze the roll for up to 2 months. Just wrap it tightly in wax paper or plastic wrap, then store it in an airtight container or freezer bag.
4. What if my Rice Krispies layer is too sticky to roll?
If the Rice Krispies mixture is too sticky, you can lightly grease your hands or the wax paper with butter to help prevent sticking.
5. How thick should I make the Rice Krispies layer?
Aim to spread the Rice Krispies layer to about 1/4 inch thick. This will give you a perfect balance of crispiness and chewiness without being too thick or too thin.
Conclusion
This Chocolate Peanut Butter Rice Krispies Roll is the perfect no-bake treat for any occasion. With its combination of crispy, gooey, and creamy textures, it’s a crowd favorite that’s easy to make and even easier to enjoy. Whether you’re preparing it for a holiday gathering or just need a sweet treat for yourself, this recipe will be sure to impress!


