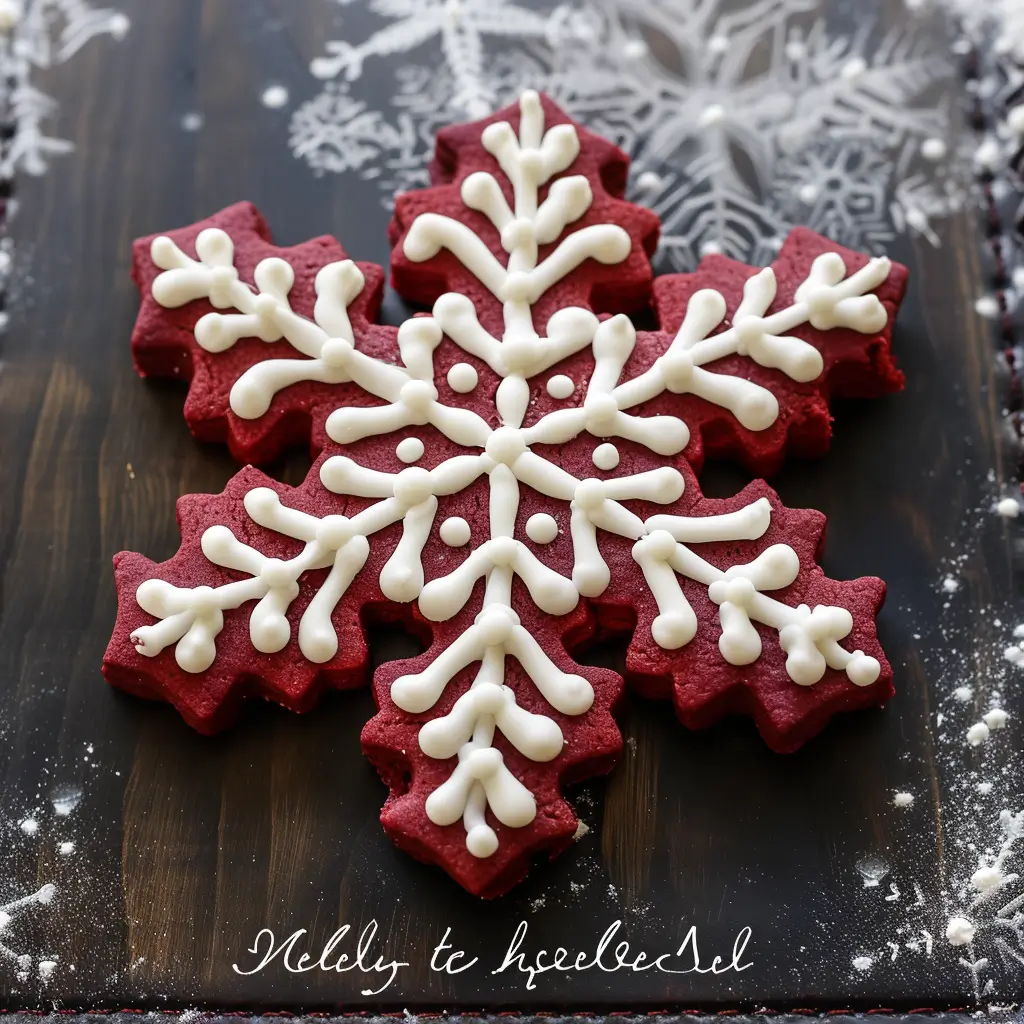
If you’re looking to bring a bit of festive magic to your holiday treats, these Red Velvet Snowflake Cookies are the perfect choice. With a striking red color and a decadent cream cheese glaze, they’re as eye-catching as they are delicious. Whether you’re preparing a holiday cookie tray, participating in a cookie exchange, or just baking for fun, these cookies are sure to impress!
Ingredients:
For the Cookies:
- 1 cup unsalted butter, softened
- 1 cup granulated sugar
- 1 large egg
- 2 teaspoons vanilla extract
- 2 ½ cups all-purpose flour
- ¼ cup cocoa powder
- 1 teaspoon baking powder
- ¼ teaspoon salt
- Red gel food coloring
For the Cream Cheese Glaze:
- 4 oz cream cheese, softened
- 1 cup powdered sugar
- ½ teaspoon vanilla extract
- 1–2 tablespoons milk (for thinning)
Directions:
Step 1: Prepare the Oven and Baking Sheets
- Preheat your oven to 350°F (175°C).
- Line your baking sheets with parchment paper to prevent sticking and make cleanup easier.
Step 2: Mix the Wet Ingredients
- In a large mixing bowl, cream together the softened butter and granulated sugar until the mixture is light and fluffy.
- Add the egg and vanilla extract, mixing well until everything is fully incorporated.
Step 3: Combine the Dry Ingredients
- In a separate bowl, whisk together the flour, cocoa powder, baking powder, and salt until well mixed.
Step 4: Create the Dough
- Gradually add the dry ingredients to the butter mixture, mixing just until a dough forms.
- Add red gel food coloring to the dough, a little at a time, until you achieve a deep, festive red color.
Step 5: Roll and Cut the Dough
- On a floured surface, roll out the dough to about ¼-inch thickness.
- Use a snowflake-shaped cookie cutter to cut out cookies, then place them on the prepared baking sheets.
Step 6: Bake the Cookies
- Bake for 8–10 minutes, or until the edges are set and the cookies are firm.
- Allow the cookies to cool on the baking sheets for a few minutes, then transfer them to a wire rack to cool completely.
Step 7: Prepare the Cream Cheese Glaze
- In a medium bowl, beat the softened cream cheese until smooth.
- Gradually add the powdered sugar, then the vanilla extract, and mix until well combined.
- Add milk, a little at a time, until the glaze reaches a drizzling consistency.
Step 8: Decorate the Cookies
- Drizzle the cream cheese glaze over the cooled cookies using a spoon or piping bag.
- Allow the glaze to set before serving to ensure a beautiful presentation.
Serving and Storage Tips
- Serving Suggestions: Serve these cookies on a holiday dessert platter, pair them with hot cocoa or coffee, or wrap them in decorative bags for a thoughtful holiday gift.
- Storage: Store the cookies in an airtight container at room temperature for up to 3 days, or refrigerate for up to a week. If storing in layers, place a piece of parchment paper between layers to prevent sticking.
Helpful Notes
- Consistent Color: Use gel food coloring for a vibrant red without affecting the dough’s consistency. Liquid food coloring can thin out the dough too much.
- Rolling the Dough: Keep the dough chilled slightly if it becomes too soft while rolling, as this will help maintain the snowflake shape during baking.
- Perfect Glaze Consistency: If the glaze is too thick, add a bit more milk; if it’s too thin, add more powdered sugar.
Tips from Well-Known Chefs
- Duff Goldman: For more intense flavor, use Dutch-processed cocoa powder, which has a smoother taste and deeper color.
- Martha Stewart: Chill the cookie dough for about 15 minutes before cutting shapes; this helps the cookies retain their shape better in the oven.
- Buddy Valastro: Use a high-quality cream cheese for the glaze to ensure a smooth and rich finish. This can make all the difference in taste and texture.
Frequently Asked Questions
1. Can I make these cookies without red food coloring?
Yes, you can omit the food coloring. The cookies will be a cocoa color but will still taste delicious!
2. How can I make these cookies gluten-free?
Use a gluten-free flour blend that’s designed for baking. The texture may be slightly different, but they’ll still be tasty.
3. Can I use regular cocoa powder instead of Dutch-processed?
Yes, you can. The color might be a bit lighter, and the flavor will be slightly different, but it will work just fine.
4. What if I don’t have a snowflake cookie cutter?
You can use any shape you like! Hearts, stars, or circles would all work well with this recipe.
5. Can I make the dough in advance?
Yes, you can prepare the dough up to 2 days in advance. Store it in the refrigerator, wrapped tightly in plastic wrap.
6. How do I keep the cookies soft?
Store them in an airtight container with a slice of bread. The bread will help keep the cookies soft by absorbing any excess moisture.
7. Can I use a different glaze?
Absolutely! A simple powdered sugar and milk glaze or a white chocolate drizzle would also be delicious.
8. Are there any alternatives to cream cheese for the glaze?
You could use mascarpone cheese for a milder flavor, or butter for a more traditional frosting.
9. Can I freeze the cookies?
Yes, you can freeze the baked cookies before glazing. Place them in a single layer in an airtight container and freeze for up to 3 months.
10. How do I prevent the glaze from smudging?
Allow the glaze to set completely at room temperature before stacking or packing the cookies. This can take anywhere from 30 minutes to an hour.
These Red Velvet Snowflake Cookies are as fun to make as they are to eat, and they’re sure to be a hit at any holiday gathering. Happy baking!