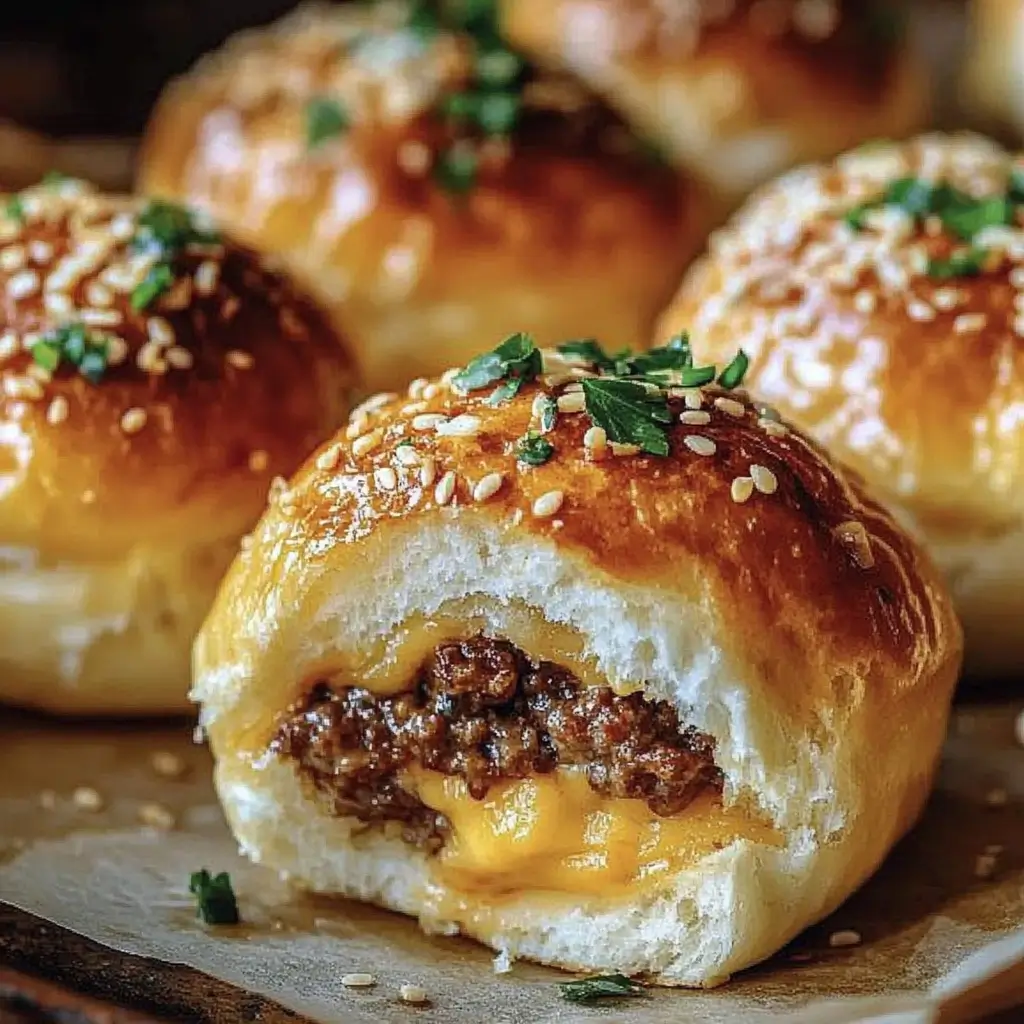
If you’re looking for a snack or appetizer that’s loaded with flavor and sure to please, Garlic Parmesan Cheeseburger Bombs are a must-try. These golden, cheesy bites pack the classic flavors of a cheeseburger into a compact, flaky biscuit dough shell. They’re perfect for game-day spreads, casual gatherings, or even as a quick dinner option when paired with a salad. Easy to make and incredibly satisfying, these bombs will have everyone asking for more!
Why You’ll Love This Recipe
- Combines the comfort of cheeseburgers with the buttery goodness of biscuit dough.
- Quick to make, with just 30 minutes from prep to table.
- Packed with gooey cheese and savory garlic-Parmesan flavor.
- Perfect for any occasion—serve them as appetizers, snacks, or even a main course.
- Kid-friendly and great for picky eaters.
Ingredients
- 1 lb ground beef: The savory base for the filling.
- 1 cup shredded cheddar cheese: Adds cheesy goodness to the filling.
- 1/2 cup cream cheese, softened: Creates a creamy texture that holds the filling together.
- 1 tsp garlic powder: Infuses the filling with a rich, garlicky flavor.
- 1 tsp onion powder: Adds depth to the beef mixture.
- Salt and pepper, to taste: Enhances all the flavors.
- 1 can (16 oz) refrigerated biscuit dough: Forms the flaky outer layer of the bombs.
- 1/4 cup grated Parmesan cheese: Gives the topping a cheesy, savory kick.
- 2 tbsp butter, melted: Helps create a golden crust and carries the Parmesan flavor.
- Fresh parsley, chopped (optional): Adds a pop of color for garnish.
Step-by-Step Directions
Step 1: Preheat and Prepare
Preheat your oven to 375°F (190°C). Line a baking sheet with parchment paper for easy cleanup and set aside.
Step 2: Cook the Beef Filling
In a skillet over medium heat, cook the ground beef until browned and fully cooked. Drain any excess grease. Stir in garlic powder, onion powder, salt, and pepper. Add the cream cheese and shredded cheddar cheese to the skillet, mixing until the filling is creamy and well combined. Remove from heat and let cool slightly.
Step 3: Prepare the Biscuit Dough
Open the can of refrigerated biscuit dough and separate the biscuits. Flatten each biscuit into a circle large enough to hold the filling.
Step 4: Fill and Seal
Spoon a generous portion of the beef and cheese mixture into the center of each flattened biscuit. Fold the dough over the filling, pinching the edges to seal tightly. Ensure there are no gaps to prevent the filling from leaking during baking.
Step 5: Add the Garlic Parmesan Topping
In a small bowl, mix the melted butter and grated Parmesan cheese. Brush the tops of the sealed bombs with the butter mixture for added flavor and a golden finish.
Step 6: Bake to Perfection
Place the prepared bombs on the lined baking sheet, leaving some space between them. Bake for 12-15 minutes, or until the bombs are golden brown and puffed.
Step 7: Garnish and Serve
Let the bombs cool for a few minutes before serving. Sprinkle with chopped fresh parsley for a touch of color and freshness.
Kitchen Equipment Needed
- Skillet
- Baking sheet
- Parchment paper
- Mixing bowls
- Pastry brush
- Spatula
Serving and Storage Tips
Serving Suggestions
- Pair with a dipping sauce like marinara, ranch, or even a smoky barbecue sauce.
- Serve alongside a crisp green salad or roasted veggies for a complete meal.
- Add them to a game-day snack platter with wings and fries.
Storage
- Store leftover cheeseburger bombs in an airtight container in the refrigerator for up to 3 days.
- Reheat in the oven at 350°F (175°C) for 5-7 minutes to maintain crispiness.
- Freeze unbaked bombs for up to 2 months. Bake directly from frozen, adding an extra 5 minutes to the baking time.
Variations
- Bacon Cheeseburger Bombs: Add crumbled bacon to the beef filling for extra flavor.
- Spicy Version: Mix diced jalapeños or a splash of hot sauce into the filling.
- Vegetarian Option: Use a plant-based ground meat substitute and your favorite veggies.
- Italian Twist: Swap the cheddar cheese for mozzarella and add a pinch of Italian seasoning to the filling.
- Breakfast Bombs: Replace the beef with cooked sausage, scrambled eggs, and shredded cheese for a breakfast-friendly version.
Helpful Notes
- Ensure the filling is cool before adding it to the biscuit dough to make sealing easier.
- Use a fork to press down on the edges of the dough for an extra-secure seal.
- If the bombs are browning too quickly, cover them loosely with aluminum foil during baking.
Tips from Well-Known Chefs
- Chef Gordon Ramsay: “Season every layer of your filling—it’s the key to rich and balanced flavor.”
- Chef Rachael Ray: “Chill the filled biscuits for a few minutes before baking to help them hold their shape.”
- Chef Guy Fieri: “A buttery garlic-Parmesan topping takes these bombs straight to Flavortown!”
Frequently Asked Questions
1. Can I use homemade biscuit dough instead of refrigerated?
Yes, homemade biscuit dough works beautifully! Just ensure it’s rolled out thin enough to wrap the filling.
2. Can I prepare these in advance?
Absolutely. Assemble the bombs, refrigerate them for up to a day, and bake when ready to serve.
3. What’s the best way to reheat them?
Reheat in the oven or air fryer for a few minutes to keep the exterior crisp and the interior warm.
4. Can I use a different type of cheese?
Yes! Mozzarella, Monterey Jack, or even a spicy pepper jack work well in this recipe.
5. Can I make these smaller for appetizers?
Definitely! Use smaller portions of dough and filling to create bite-sized versions, adjusting the bake time slightly.
Garlic Parmesan Cheeseburger Bombs are a cheesy, savory delight that’s sure to become a favorite. With a buttery crust, flavorful filling, and irresistible garlic-Parmesan topping, these bombs are the ultimate comfort food. Give them a try—you won’t regret it!


