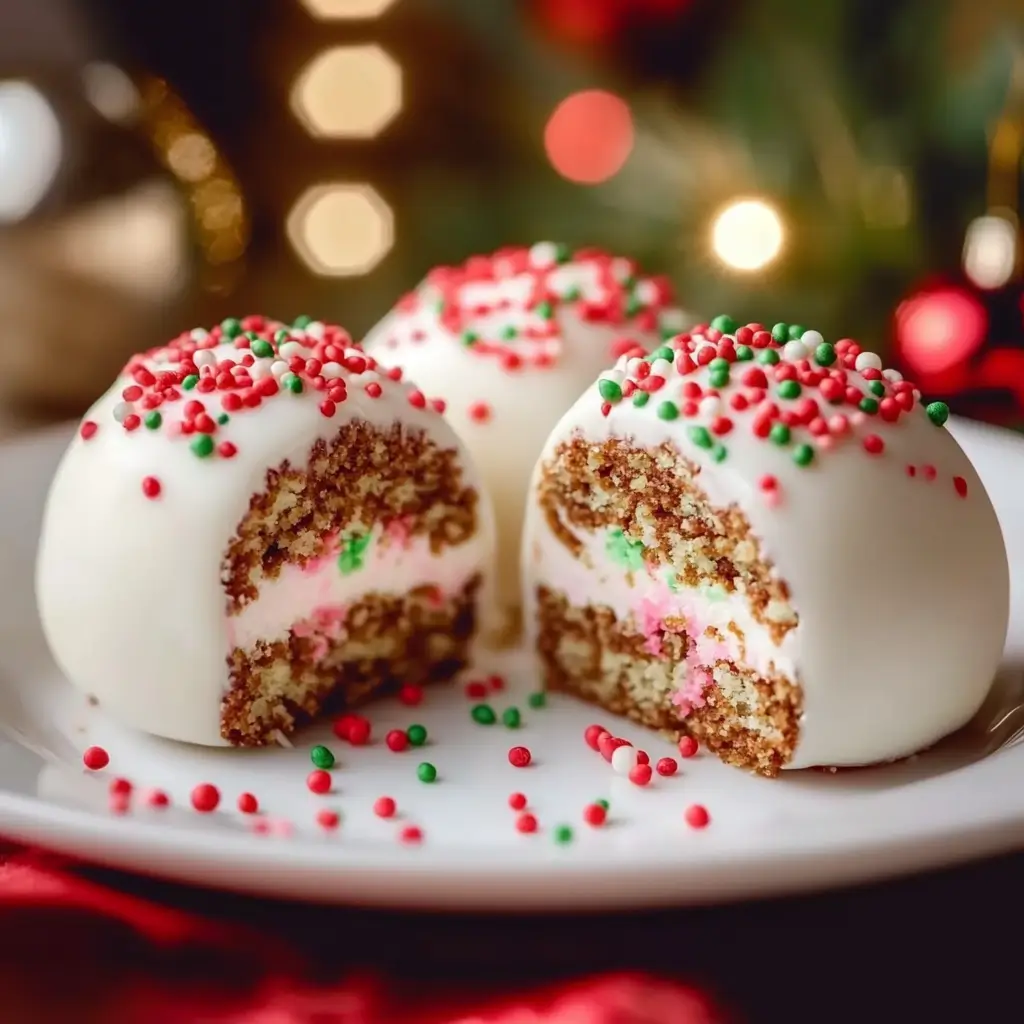
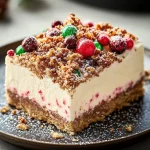
Bring holiday magic to your dessert table with these festive Little Debbie Christmas Cake Balls! Made with crumbled vanilla Christmas Tree Cakes and cream cheese, then coated in white chocolate and sprinkled with red and green sanding sugar, these bite-sized treats are easy to make and perfect for parties, gifting, or a fun holiday project with kids.
Why You’ll Love This Recipe
- Quick and Easy: No baking required, making these a great last-minute holiday dessert.
- Festive and Fun: With their red, green, and white decorations, these cake balls capture the spirit of Christmas.
- Perfect for Gifting: They’re ideal for holiday platters, party favors, or as gifts for family and friends.
- Customizable: Swap decorations or add different candy melts to match any holiday theme.
Ingredients
- 2 boxes (5-count each) vanilla Little Debbie Christmas Tree Cakes, crumbled
- 1 (8 oz) package cream cheese, softened to room temperature
- 1 (16 oz) package white candy melts
- 1/4 cup red candy melts, melted (optional for decoration)
- Red and green sanding sugar, for garnish
Step-by-Step Directions
- Prepare the Dough: In a large mixing bowl, crumble the Little Debbie Christmas Tree Cakes. Add the softened cream cheese and mix until it forms a smooth, sticky dough.
- Shape the Balls: Roll the mixture into small, bite-sized balls (about 1 inch in diameter) and place them on a parchment-lined baking sheet.
- Chill: Refrigerate the cake balls for about 30 minutes. This step helps them firm up and makes coating easier.
- Coat with White Chocolate: Melt the white candy melts according to package directions. Using a fork or toothpick, dip each chilled cake ball into the melted white chocolate, making sure they’re fully coated. Place them back on the parchment paper.
- Decorate: While the coating is still soft, drizzle each ball with the melted red candy melts. Sprinkle with red and green sanding sugar to give them a festive holiday look.
- Set: Allow the cake balls to cool completely and let the candy coating harden before serving.
Kitchen Equipment Needed
- Large mixing bowl
- Measuring cups
- Parchment paper-lined baking sheet
- Fork or toothpicks for dipping
- Small bowl for candy melts
Serving and Storage Tips
- Serving: Arrange these festive cake balls on a holiday platter or in small gift boxes for a beautiful presentation. They’re a great treat for holiday parties and dessert buffets.
- Storage: Store in an airtight container in the refrigerator for up to one week. For best flavor and texture, let them sit at room temperature for about 10 minutes before serving.
Recipe Variations
- Chocolate Lovers’ Version: Use chocolate candy melts instead of white candy melts for a richer flavor. Drizzle with white or green melted candy for contrast.
- Minty Twist: Add a few drops of peppermint extract to the dough for a subtle, refreshing holiday flavor.
- Additional Decorations: Use mini Christmas sprinkles or edible glitter for added sparkle and color.
Helpful Notes
- Easier Dipping: Chilling the cake balls before dipping helps them hold their shape and makes coating them in chocolate easier.
- Sanding Sugar Tip: Sprinkle the sanding sugar immediately after dipping, as the candy coating sets quickly.
- Cream Cheese Softness: Ensure your cream cheese is fully softened to mix smoothly with the cake crumbs.
Tips from Dessert Experts
- Chef Sally McKenney: “To make the cake balls extra smooth, use your hands to knead the mixture—it ensures everything is well incorporated and easy to shape.”
- Chef Tessa Arias: “Use a small fork or dipping tool to lower the cake balls into the melted candy, then tap the fork on the side of the bowl to remove excess coating.”
Frequently Asked Questions
Q1: Can I use a different type of cake?
Yes! If you can’t find Little Debbie Christmas Tree Cakes, use another vanilla snack cake or even bake a quick vanilla cake and crumble it up.
Q2: Can I make these ahead of time?
Yes, they’re a perfect make-ahead dessert! Prepare and refrigerate for up to a week.
Q3: Can I use a different color of candy melts?
Absolutely! Feel free to use green, red, or any color that matches your holiday theme.
Q4: How can I make them dairy-free?
Use a dairy-free cream cheese alternative and ensure that the candy melts you use are also dairy-free.
Q5: Can I freeze these cake balls?
Yes, you can freeze them after coating. Thaw in the refrigerator, then bring to room temperature before serving.
Enjoy the Sweet Festivity of Christmas Cake Balls
These Little Debbie Christmas Cake Balls are a fun, festive treat that’s sure to delight kids and adults alike. With their colorful decorations and creamy texture, they make a delicious addition to any holiday dessert table. Easy, no-bake, and perfectly sweet, these Christmas tree cake balls bring a touch of joy to the season!
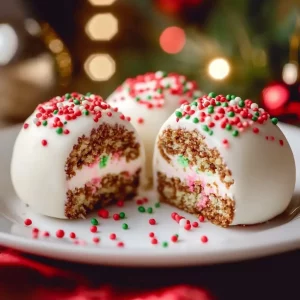
Little Debbie Christmas Cake Balls
Ingredients
- 2 boxes 5-count each vanilla Little Debbie Christmas Tree Cakes, crumbled
- 1 8 oz package cream cheese, softened to room temperature
- 1 16 oz package white candy melts
- 1/4 cup red candy melts melted (optional for decoration)
- Red and green sanding sugar for garnish
Instructions
- Prepare the Dough: In a large mixing bowl, crumble the Little Debbie Christmas Tree Cakes. Add the softened cream cheese and mix until it forms a smooth dough.
- Shape the Balls: Roll the mixture into small, bite-sized balls and place them on a parchment-lined baking sheet.
- Chill: Refrigerate the cake balls for about 30 minutes to help them firm up for coating.
- Coat with White Chocolate: Melt the white candy melts according to package directions. Using a fork or toothpick, dip each chilled cake ball into the melted white chocolate, ensuring they’re fully coated. Place them back on the parchment paper.
- Decorate: While the coating is still soft, drizzle each ball with the melted red candy melts and sprinkle with red and green sanding sugar for a festive finish.
- Set: Allow the cake balls to cool and the candy coating to harden completely before serving.
Notes
- Extra Festive Look: Use a fork to drizzle red and green candy melts in a crisscross pattern over the coated balls for added color.
- Storage: Store in an airtight container in the refrigerator for up to one week.

