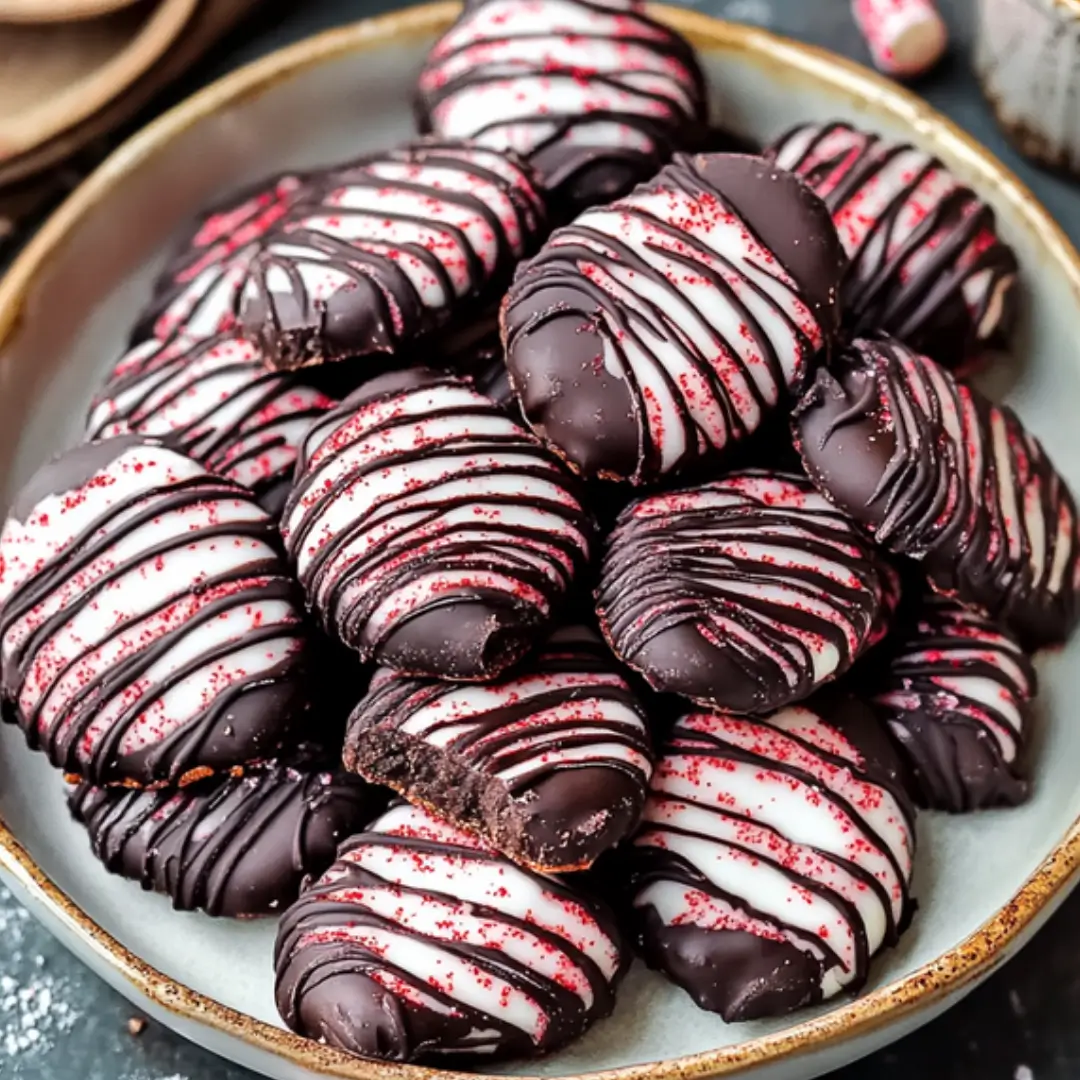
These Marbled Dark Chocolate Peppermint Spritz Cookies are the perfect blend of festive flair and decadent flavor. Their striking marbled design, infused with peppermint and rich cocoa, makes them a showstopper for holiday gatherings. Quick to make and irresistibly delicious, these cookies are a must-try for the season!
Why You Will Love Marbled Dark Chocolate Peppermint Spritz Cookies
- Festive and Beautiful: The marbled red and white chocolate design is eye-catching and perfect for the holidays.
- Quick and Easy: Ready in just 25 minutes, these cookies are ideal for last-minute holiday baking.
- Mint-Chocolate Magic: The pairing of dark chocolate and peppermint creates a classic and refreshing flavor combo.
- Perfect Texture: Buttery and crisp with a melt-in-your-mouth finish.
- Great for Gifting: These cookies are stunningly beautiful and travel well, making them a thoughtful holiday gift.
Ingredients Notes
- Butter: Ensure it’s softened to room temperature for easy creaming, which creates the perfect cookie texture.
- Peppermint Extract: Adds a refreshing flavor that pairs wonderfully with the chocolate. Adjust to taste if you prefer a milder or stronger peppermint flavor.
- Dark Chocolate Cocoa Powder: Choose unsweetened for a deep, rich chocolate flavor. Regular cocoa powder can be used as a substitute but may alter the intensity of the flavor.
- White Chocolate Baking Melts: These create the marbled design. You can also use white chocolate chips, but melts are easier to work with.
- Red Gel Food Coloring: Provides the vibrant marbled effect. Gel coloring works best because it doesn’t thin out the chocolate like liquid coloring might.
Kitchen Equipment Needed
- Mixing bowls (large and medium)
- Hand or stand mixer
- Whisk
- Cookie press
- Baking sheets
- Wire rack
- Microwave-safe bowl
- Toothpicks
- Wax paper
How to Make Marbled Dark Chocolate Peppermint Spritz Cookies
- Preheat the Oven: Set your oven to 375°F (190°C).
- Prepare the Dough: In a large mixing bowl, cream together the butter and sugar until light and fluffy. Add the egg, peppermint extract, and vanilla extract, mixing until fully combined.
- Mix the Dry Ingredients: In a separate bowl, whisk together the flour, cocoa powder, and salt. Gradually add the dry ingredients to the wet ingredients, mixing until the dough is smooth and very dark in color.
- Press the Cookies: Load the dough into a cookie press and press shapes onto a cool, ungreased baking sheet.
- Bake: Bake the cookies for 5 minutes. Remove from the oven and allow them to cool on the baking sheet for 2 minutes before transferring them to a wire rack to cool completely.
- Melt the White Chocolate: In a small microwave-safe bowl, melt the white chocolate baking melts according to the package directions.
- Create the Marbled Design: Squeeze a few drops of red gel food coloring onto the melted white chocolate. Use a toothpick to swirl the color for a marbled effect.
- Dip the Cookies: Dip one side of each cookie into the marbled white chocolate mixture. Place the cookies on wax paper to cool and harden. Repeat with all cookies, adding more food coloring and swirling as needed.
- Cool and Set: Let the cookies sit at room temperature until the white chocolate sets completely.
Serving and Storage Tips
Serving:
- Serve these cookies on a festive platter alongside hot cocoa or peppermint tea for the ultimate holiday vibe.
- Sprinkle with edible glitter or crushed peppermint candies for an extra festive touch.
Storage:
- Room Temperature: Store in an airtight container for up to 5 days.
- Freezer: Freeze the cookies without the white chocolate coating for up to 3 months. Add the marbled design after thawing.
Variations
- Chocolate Peppermint Bark Spritz: Add crushed candy canes to the white chocolate coating for a crunchy, peppermint bark-inspired finish.
- Gold Marbled Design: Swap the red gel food coloring for edible gold dust or gold food coloring for an elegant twist.
- Gluten-Free Option: Replace all-purpose flour with a gluten-free 1:1 baking flour to make these cookies gluten-free.
Helpful Notes
- Cookie Press Tips: If your cookie press dough isn’t sticking to the baking sheet, try chilling the baking sheet beforehand.
- Swirling Success: Work quickly with the marbled white chocolate to avoid it setting before all the cookies are dipped.
- Prevent Overbaking: Spritz cookies bake quickly—keep an eye on them to prevent burning.
Tips from Well-Known Bakers
- Martha Stewart: “Always cream the butter and sugar thoroughly to create the right structure in your cookie dough.”
- Sally McKenney: “Gel food coloring is a baker’s best friend for vibrant colors without compromising texture.”
- Duff Goldman: “For a flawless swirl effect, don’t overmix the food coloring into the melted chocolate.”
Frequently Asked Questions (FAQ)
1. Can I make the dough ahead of time?
Yes! You can refrigerate the dough for up to 24 hours. Bring it back to room temperature before using it in the cookie press.
2. What if I don’t have a cookie press?
You can roll the dough into small balls and flatten them slightly with a fork for a simple design.
3. Can I use liquid food coloring instead of gel?
Gel food coloring is recommended because it doesn’t thin out the chocolate. If using liquid, use sparingly to avoid altering the consistency.
4. How do I keep the white chocolate smooth while dipping?
Work in small batches and reheat the chocolate as needed to maintain a smooth consistency.
5. Can I double this recipe?
Absolutely! Just ensure you have enough baking sheets and white chocolate on hand to accommodate the extra cookies.
These Marbled Dark Chocolate Peppermint Spritz Cookies are not just cookies; they’re a holiday celebration in every bite. Happy baking!


