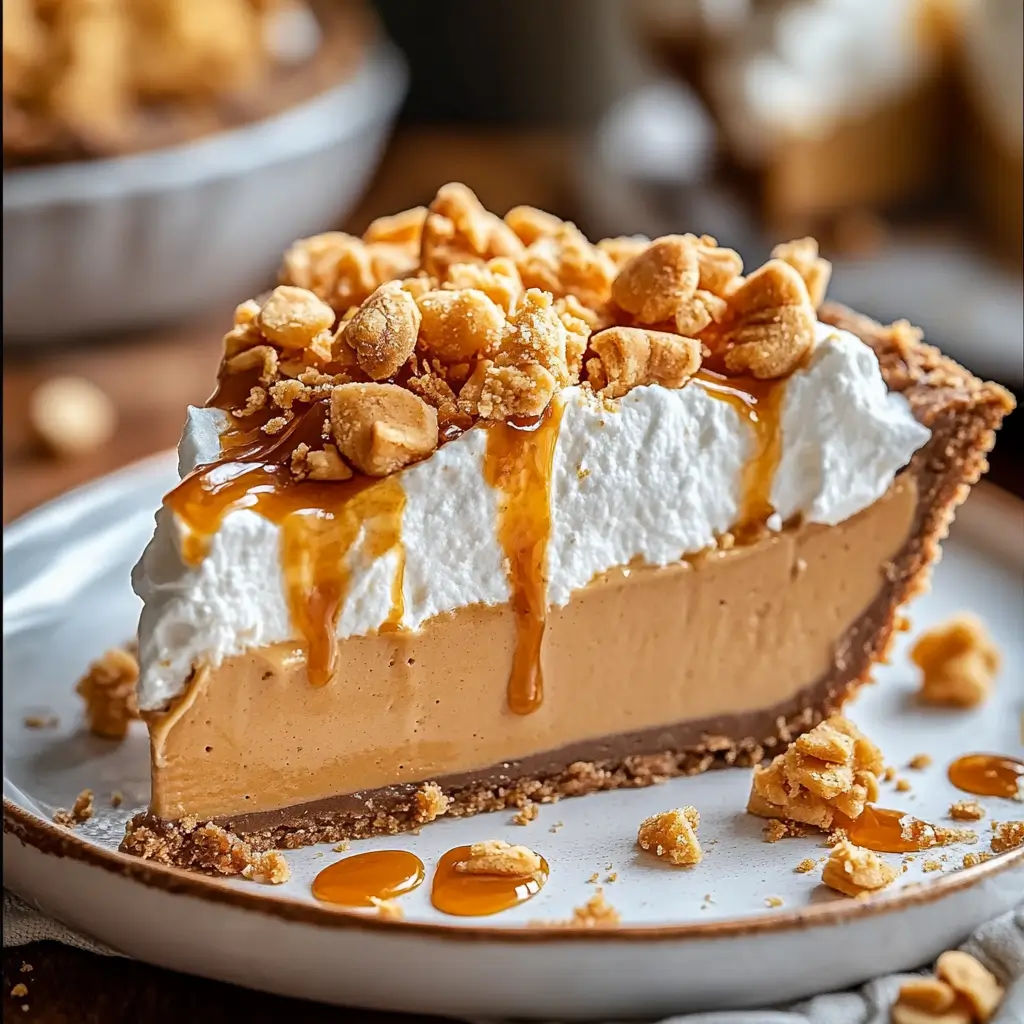
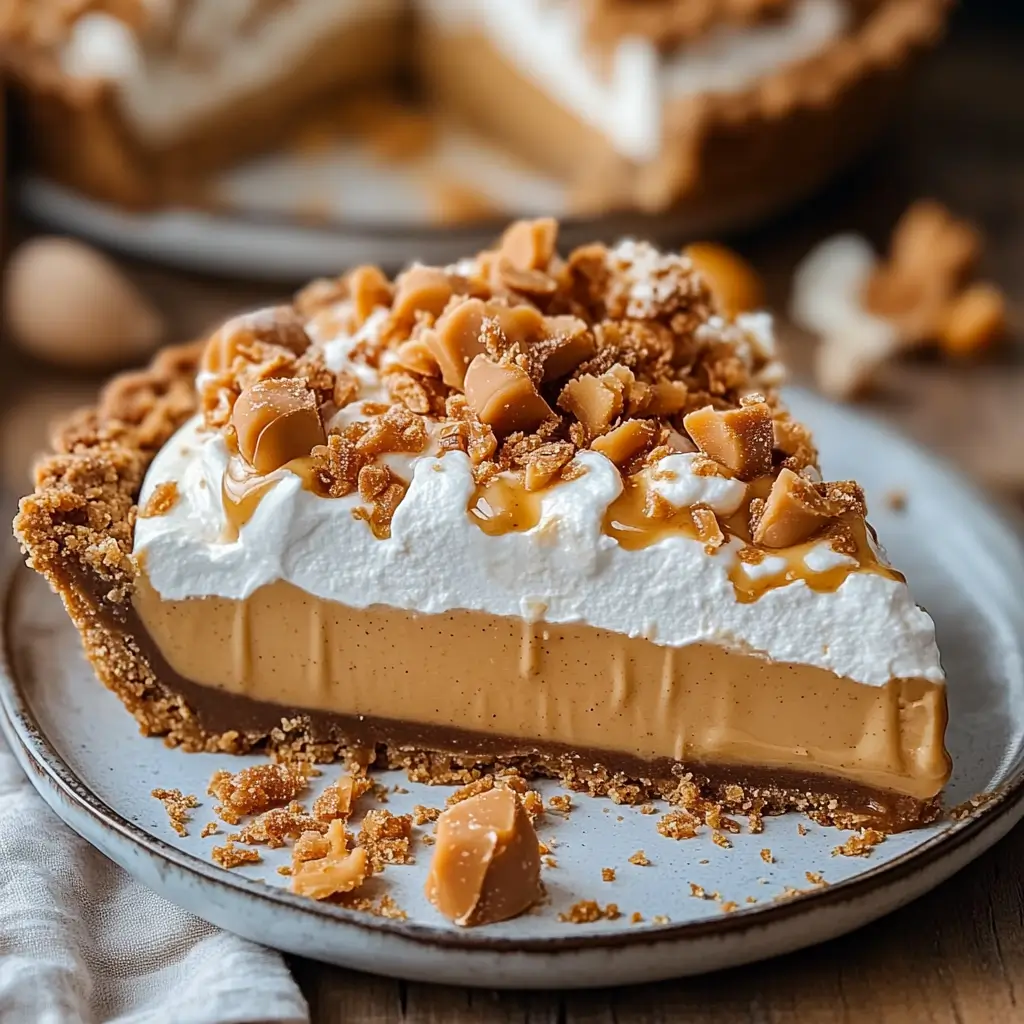
If you’re looking for a show-stopping dessert that’s both easy to make and absolutely indulgent, this No-Bake Butterscotch Pie is the perfect choice. With its buttery graham cracker crust, creamy butterscotch filling, and luscious whipped topping, every bite feels like a little piece of heaven. Whether it’s for a holiday, dinner party, or just a treat-yourself moment, this pie is sure to impress.
Why You Will Love No-Bake Butterscotch Pie
Our No-Bake Butterscotch Pie is a no-fuss dessert that’s packed with rich, caramel-like flavor and creamy texture. Here’s why it’s a must-make:
- Simple and quick: No need to turn on the oven—perfect for busy days.
- Decadent layers: Buttery crust, smooth filling, and airy topping create a perfect balance.
- Make-ahead convenience: Chill overnight for stress-free entertaining.
Ingredient Notes for No-Bake Butterscotch Pie
Each ingredient plays a crucial role in creating this indulgent dessert.
Crust
- 2 cups graham cracker crumbs: The base of the pie; provides a sweet and crunchy foundation.
- 1/2 cup unsalted butter, melted: Binds the crumbs together and adds richness.
Butterscotch Filling
- 1 cup butterscotch chips: Delivers the signature caramelized butterscotch flavor.
- 2 cups whole milk: Creates a smooth and creamy consistency.
- 1/2 cup granulated sugar: Sweetens the filling.
- 1/4 cup cornstarch: Thickens the filling for a luscious texture.
- 3 large egg yolks: Adds richness and stability to the custard.
- 1 tsp vanilla extract: Enhances the butterscotch flavor.
Topping
- 1 1/2 cups whipped topping (or freshly whipped cream): Adds a light and airy finish.
- Butterscotch chips or caramel drizzle (optional): For a decorative and flavorful garnish.
Pro Tip: For a twist, you can use a chocolate graham cracker crust to add a deeper, complementary flavor.
Kitchen Equipment Needed
- Medium saucepan
- Whisk
- 9-inch pie pan
- Mixing bowls
- Plastic wrap
- Spatula
How to Make No-Bake Butterscotch Pie
Prepare the Crust
Mix the graham cracker crumbs and melted butter in a bowl until the crumbs are evenly moistened. Firmly press the mixture into a 9-inch pie pan, spreading it evenly along the base and up the sides. Chill the crust in the refrigerator while preparing the filling.
Make the Butterscotch Filling
In a medium saucepan, combine the butterscotch chips and 1 1/2 cups of milk. Heat over medium heat, stirring continuously, until the chips are fully melted and the mixture is smooth.
In a separate small bowl, whisk together the remaining 1/2 cup milk, sugar, cornstarch, and egg yolks until smooth. Gradually pour this mixture into the saucepan with the melted butterscotch, whisking constantly. Cook over medium heat, whisking, until the filling thickens, about 5–7 minutes. Remove from heat and stir in the vanilla extract.
Assemble the Pie
Pour the warm butterscotch filling into the chilled crust. Use a spatula to smooth the surface evenly. Cover the filling with plastic wrap, pressing it directly onto the surface to prevent a skin from forming. Refrigerate the pie for at least 4 hours or until fully set.
Add the Topping
Once the pie is set, spread the whipped topping evenly over the surface. For a decorative touch, garnish with butterscotch chips or drizzle caramel sauce on top.
Serve and Enjoy
Slice the pie into generous portions and serve chilled. Each bite is creamy, sweet, and utterly satisfying—a dessert your guests won’t forget!
Serving and Storage Tips
- Serving: Pair the pie with a hot cup of coffee or tea for the ultimate dessert experience.
- Storage: Store in an airtight container in the refrigerator for up to 4 days.
- Freezing: The pie can be frozen (without the whipped topping) for up to 2 months. Thaw in the refrigerator and add the topping just before serving.
Variations and Substitutions
This No-Bake Butterscotch Pie is versatile enough for fun twists:
- Salted caramel: Add a pinch of sea salt to the butterscotch filling for a salted caramel flavor.
- Nutty twist: Sprinkle chopped pecans or walnuts over the whipped topping for added crunch.
- Chocolate flair: Replace half the butterscotch chips with white or milk chocolate chips for a unique flavor blend.
Helpful Notes
- Whisk constantly when cooking the filling to avoid lumps and ensure a smooth texture.
- Let the pie chill for the full 4 hours—or overnight for best results—to fully set the filling.
- For freshly whipped cream, whip 1 cup of heavy cream with 2 tablespoons of sugar until soft peaks form.
Tips from Well-Known Chefs
- Ina Garten: “Always use high-quality vanilla extract for a richer flavor in custards and fillings.”
- Martha Stewart: “Press your crust firmly and evenly—it’s the key to a sturdy base.”
- Mary Berry: “Don’t rush the chilling process; a well-set filling makes slicing and serving easier.”
Frequently Asked Questions (FAQ)
Q: Can I use a store-bought crust?
A: Yes, a pre-made graham cracker crust works perfectly for convenience.
Q: Can I make this pie ahead of time?
A: Absolutely! The pie can be made 1–2 days in advance. Just add the whipped topping and garnish before serving.
Q: What if my filling doesn’t thicken?
A: Continue cooking and whisking over medium heat. If it remains thin, try dissolving an extra teaspoon of cornstarch in cold milk and adding it to the saucepan.
Q: Can I use another type of milk?
A: Whole milk is best for creaminess, but 2% milk works too. Avoid skim or plant-based milk, as the consistency may be affected.
Q: How do I prevent the crust from crumbling?
A: Be sure to pack the crust firmly into the pie pan and chill it thoroughly before adding the filling.
In conclusion, this No-Bake Butterscotch Pie is a dessert lover’s dream—rich, creamy, and oh-so-easy to make. Whether it’s for a family gathering or a sweet treat for yourself, this pie is guaranteed to delight every time. Happy no-baking!

