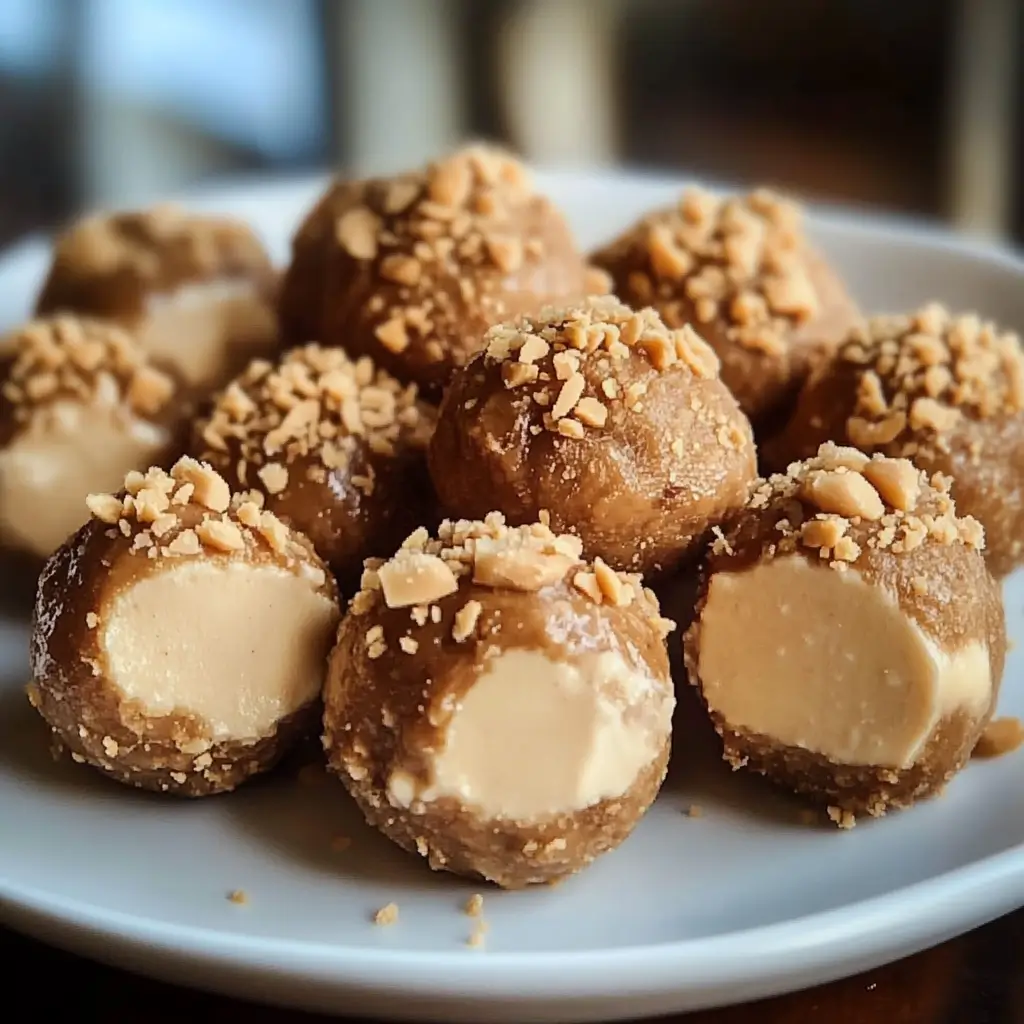
These No-Bake Peanut Butter Cheesecake Balls are a decadent treat that combines the creamy richness of cheesecake with the classic pairing of peanut butter and chocolate. With no baking required, they’re quick and easy to make, making them a fantastic option for holiday treats, party favors, or anytime you’re craving a sweet bite of pure indulgence.
Why You’ll Love This Recipe
- Quick and Easy: No baking required—just mix, chill, and dip.
- Rich and Creamy: Cream cheese and peanut butter create a smooth, cheesecake-like filling.
- Chocolate-Coated Delight: Each ball is dipped in semi-sweet chocolate, adding a satisfying crunch.
- Perfect for Sharing: With a yield of 24 balls, they’re ideal for gatherings or gift boxes.
Ingredients
- 8 oz cream cheese, softened
- 1 cup creamy peanut butter
- 1 cup powdered sugar
- 1 teaspoon vanilla extract
- 1½ cups graham cracker crumbs
- 1½ cups semi-sweet chocolate chips (for dipping)
- 1 tablespoon coconut oil or butter (for melting chocolate)
Step-by-Step Instructions
Step 1: Make the Cheesecake Mixture
In a large mixing bowl, use an electric mixer to beat the softened cream cheese and peanut butter together until smooth and creamy. Gradually add in the powdered sugar and vanilla extract, mixing until fully combined. Fold in the graham cracker crumbs until the mixture forms a thick, sticky dough.
Step 2: Form the Balls
Scoop out tablespoon-sized portions of the mixture and roll them into small balls. Place each ball on a baking sheet lined with parchment paper.
Step 3: Chill
Place the baking sheet in the refrigerator and chill the balls for about 30 minutes, or until they’re firm.
Step 4: Melt the Chocolate
In a microwave-safe bowl, combine the chocolate chips and coconut oil or butter. Heat in 20-30 second intervals, stirring between each, until the chocolate is completely melted and smooth.
Step 5: Dip the Balls
Remove the cheesecake balls from the fridge. Using a fork or skewer, dip each ball into the melted chocolate, making sure to coat it evenly. Let any excess chocolate drip off before placing it back onto the parchment-lined baking sheet.
Step 6: Set the Chocolate
Return the baking sheet to the refrigerator and chill for another 30 minutes to allow the chocolate coating to harden.
Step 7: Serve and Enjoy
Once the chocolate is firm, your No-Bake Peanut Butter Cheesecake Balls are ready to be enjoyed. Store any leftovers in an airtight container in the refrigerator.
Kitchen Equipment Needed
- Large mixing bowl
- Electric mixer
- Measuring cups and spoons
- Baking sheet lined with parchment paper
- Microwave-safe bowl
- Fork or skewer for dipping
Serving and Storage Tips
Serving Suggestions: These are perfect as a bite-sized dessert for parties, holiday platters, or as a snack. They pair wonderfully with coffee or a glass of cold milk.
Storage: Store in an airtight container in the refrigerator for up to a week.
Freezing: These can also be frozen for up to 2 months. Simply thaw them in the fridge before serving.
Recipe Variations
- Add a Crunchy Coating: Roll the balls in crushed peanuts or graham cracker crumbs after dipping in chocolate for added texture.
- Use White Chocolate: Substitute semi-sweet chocolate with white chocolate for a sweeter, contrasting flavor.
- Add a Sprinkle of Sea Salt: Sprinkle a pinch of flaky sea salt on top of each ball after dipping for a sweet-and-salty twist.
- Try Different Nut Butters: Swap peanut butter for almond or cashew butter for a different flavor profile.
Helpful Notes
- Soften Cream Cheese: Ensure the cream cheese is fully softened to make mixing easier and to avoid lumps in the filling.
- Chill Time: Chilling the balls before dipping them in chocolate helps them hold their shape and makes them easier to coat.
- Chocolate Melting: Be patient and melt the chocolate in short intervals to prevent it from burning. Stir between intervals to ensure smooth consistency.
- Smooth Chocolate Coating: Use a fork or skewer to dip the balls in chocolate and let the excess drip off for a smooth, even coating.
Tips from Well-Known Chefs
Ree Drummond’s Tip for Cheesecake Bites: For a smooth, lump-free filling, always soften cream cheese fully before mixing. This prevents clumping and makes for a silky texture.
David Lebovitz’s Chocolate Tip: Adding a small amount of coconut oil to melted chocolate helps create a smooth coating that hardens evenly.
Frequently Asked Questions
Can I use natural peanut butter?
It’s best to use regular creamy peanut butter for this recipe, as natural peanut butter can be too oily and may affect the texture of the filling.
What can I substitute for graham cracker crumbs?
Crushed digestive biscuits, vanilla wafers, or even crushed pretzels can work as substitutes for a slightly different flavor.
Do I have to use coconut oil in the chocolate?
No, you can use butter instead. Coconut oil simply helps the chocolate melt smoothly and set with a shiny finish.
Can I make these ahead of time?
Yes, these cheesecake balls can be made up to a week in advance and stored in the fridge. They also freeze well if you need to prepare them even further in advance.
How can I prevent chocolate from clumping during melting?
If you find the chocolate seizing, try adding a few more drops of coconut oil or butter and stir until smooth. Melting the chocolate slowly in short intervals helps prevent clumping.
These No-Bake Peanut Butter Cheesecake Balls are creamy, chocolatey, and satisfyingly rich—an easy dessert that’s as impressive as it is delicious! Perfect for any chocolate and peanut butter lover.

No-Bake Peanut Butter Cheesecake Balls Recipe
Ingredients
- 8 oz cream cheese softened
- 1 cup creamy peanut butter
- 1 cup powdered sugar
- 1 teaspoon vanilla extract
- 1 1/2 cups graham cracker crumbs
- 1 1/2 cups semi-sweet chocolate chips for dipping
- 1 tablespoon coconut oil or butter for melting chocolate
Instructions
- Make the Cheesecake Mixture: In a large bowl, use an electric mixer to blend the softened cream cheese and peanut butter until creamy and smooth. Gradually add powdered sugar and vanilla extract, mixing until well combined. Fold in the graham cracker crumbs until a thick, sticky dough forms.
- Form the Balls: Scoop out tablespoon-sized portions of the mixture and roll them into small balls. Place the balls on a baking sheet lined with parchment paper.
- Chill: Refrigerate the balls for about 30 minutes to firm up.
- Melt the Chocolate: In a microwave-safe bowl, melt the chocolate chips and coconut oil in 20-30 second intervals, stirring between each interval until smooth.
- Dip the Balls: Remove the cheesecake balls from the fridge. Using a fork or skewer, dip each ball into the melted chocolate, coating evenly. Let the excess chocolate drip off before placing them back on the parchment-lined baking sheet.
- Set the Chocolate: Once all balls are coated, return the baking sheet to the refrigerator for another 30 minutes to let the chocolate set.
- Serve and Enjoy: Once the chocolate coating is firm, your No-Bake Peanut Butter Cheesecake Balls are ready to enjoy!
Notes
- Soften Cream Cheese: Ensure the cream cheese is fully softened to make mixing easier and to avoid lumps in the filling.
- Chill Time: Chilling the balls before dipping them in chocolate helps them hold their shape and makes them easier to coat.
- Chocolate Melting: Be patient and melt the chocolate in short intervals to prevent it from burning. Stir between intervals to ensure smooth consistency.
- Smooth Chocolate Coating: Use a fork or skewer to dip the balls in chocolate and let the excess drip off for a smooth, even coating.


