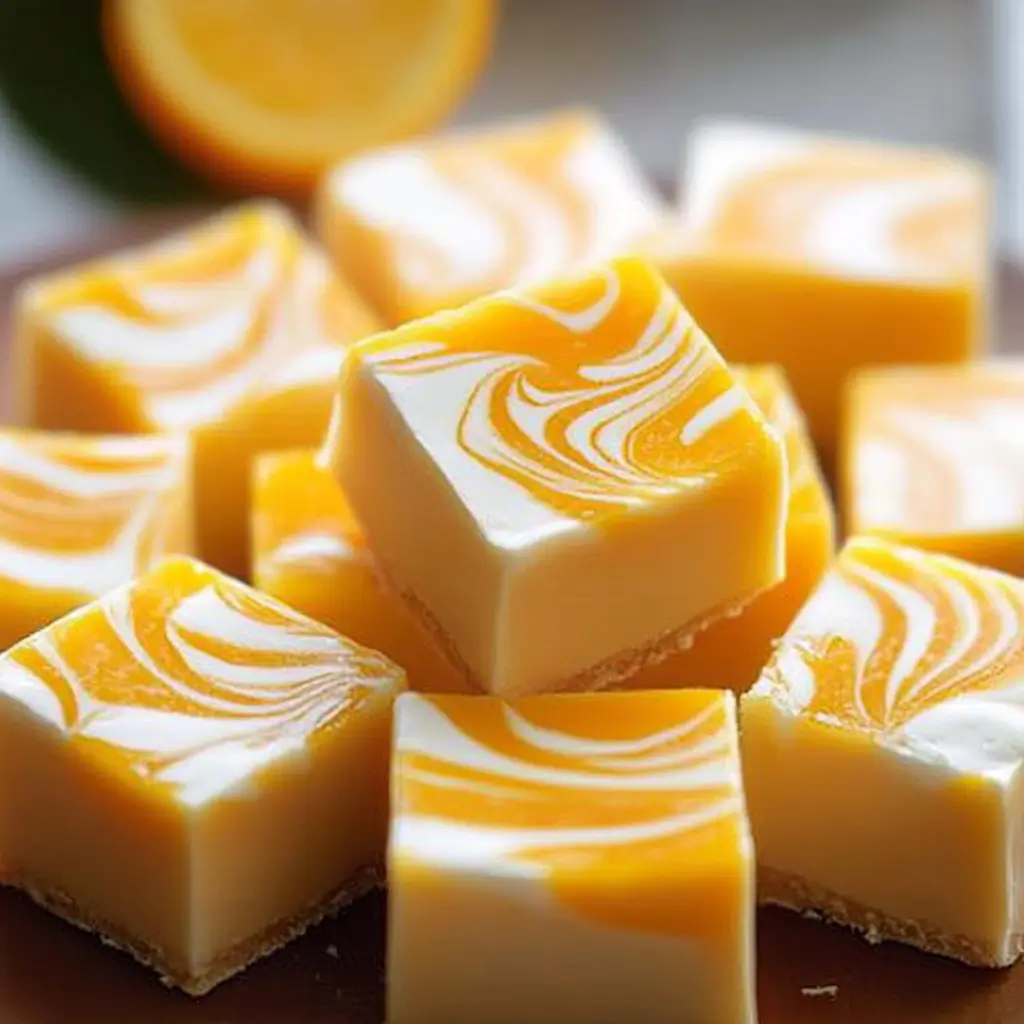
This Orange Dreamsicle Fudge is a creamy, citrusy treat inspired by the classic orange creamsicle. With its sweet, tangy orange flavor and luscious, melt-in-your-mouth texture, this fudge will bring a burst of summer to any season. Perfect for sharing or gifting, it’s as easy to make as it is delicious!
Why You’ll Love This Recipe
- Burst of flavor: Combines the refreshing tang of orange with the creamy richness of white chocolate.
- No special equipment: Just a saucepan and a pan to set the fudge.
- Beautiful presentation: Bright orange swirls make it as eye-catching as it is tasty.
- Crowd-pleaser: Perfect for parties, holidays, or as a gift.
Ingredients
Baking & Spices:
- 10 drops orange food coloring (adjust as needed for desired color)
- 3 cups granulated sugar
- 3 teaspoons orange extract
- 2 cups white chocolate chips
Dairy:
- 3/4 cup unsalted butter
- 2/3 cup heavy cream
- 7 ounces marshmallow cream (or fluff)
Kitchen Equipment Needed
- 8×8-inch baking pan
- Parchment paper or non-stick spray
- Medium saucepan
- Wooden spoon or silicone spatula
- Measuring cups and spoons
Step-by-Step Instructions
Step 1: Prepare the Pan
- Line an 8×8-inch baking pan with parchment paper, leaving a bit of overhang for easy removal. Alternatively, lightly grease the pan. Set aside.
Step 2: Make the Fudge Base
- In a medium saucepan, combine the butter, granulated sugar, and heavy cream.
- Heat over medium heat, stirring constantly, until the butter has melted and the sugar is fully dissolved.
- Bring the mixture to a boil and let it cook for 5 minutes, stirring occasionally to prevent burning.
Step 3: Add Marshmallow Cream and Orange Extract
- Remove the saucepan from heat.
- Stir in the marshmallow cream, orange extract, and orange food coloring. Mix until the ingredients are smooth and evenly combined.
Step 4: Add White Chocolate
- Stir in the white chocolate chips while the mixture is still hot.
- Continue stirring until the chocolate is fully melted and the fudge is creamy and smooth.
Step 5: Pour and Set the Fudge
- Pour the fudge mixture into the prepared baking pan.
- Spread it out evenly with a spatula, and tap the pan gently on the counter to smooth the surface.
- Allow the fudge to cool at room temperature for about 1 hour. Then transfer it to the refrigerator and chill for 2-3 hours, or until fully firm.
Step 6: Slice and Serve
- Once the fudge is completely set, lift it out of the pan using the parchment paper overhang.
- Cut the fudge into small squares using a sharp knife.
- Serve immediately or store for later enjoyment.
Serving and Storage Tips
- Serving: Serve chilled or at room temperature. It pairs beautifully with coffee or tea.
- Storage: Store in an airtight container in the refrigerator for up to 1 week.
- Freezing: Freeze fudge squares in a freezer-safe container for up to 3 months. Thaw in the refrigerator before serving.
Variations
- Layered Dreamsicle: Pour half the fudge mixture into the pan, then mix a little more orange food coloring into the remaining fudge and pour on top for a layered effect.
- Nutty twist: Fold in 1/2 cup chopped almonds or macadamia nuts for added texture.
- Zesty addition: Add 1 teaspoon of orange zest to enhance the citrus flavor.
- Marble effect: Swirl in a few extra drops of orange food coloring for a marbled look.
Helpful Notes
- Use high-quality white chocolate chips for the creamiest texture and richest flavor.
- Stir continuously while boiling to avoid sugar crystallizing or sticking to the bottom of the pan.
- Make sure the fudge cools fully before cutting for clean, sharp edges.
Tips from Well-Known Chefs
- Ina Garten: “Always use real extracts for the best flavor—orange extract makes all the difference in this fudge.”
- Mary Berry: “Let your fudge rest in the fridge overnight for an even firmer texture.”
- Nigella Lawson: “To ensure a smooth fudge, melt the white chocolate slowly and stir continuously.”
Frequently Asked Questions
Q: Can I use milk chocolate instead of white chocolate?
A: While the flavor will change, you can use milk chocolate for a different twist on this fudge.
Q: Can I skip the food coloring?
A: Yes! The fudge will still taste delicious without food coloring, though it won’t have the signature orange hue.
Q: Can I double the recipe?
A: Absolutely. Use a 9×13-inch pan instead of an 8×8-inch pan to accommodate the larger batch.
Q: What can I use instead of marshmallow cream?
A: You can substitute 1 cup of mini marshmallows, but the texture may be slightly different.
Q: Why is my fudge grainy?
A: Graininess can happen if the sugar isn’t fully dissolved. Stir continuously and ensure the sugar melts completely.
This Orange Dreamsicle Fudge is a sweet, citrusy treat that’s perfect for sharing—or keeping all to yourself!


