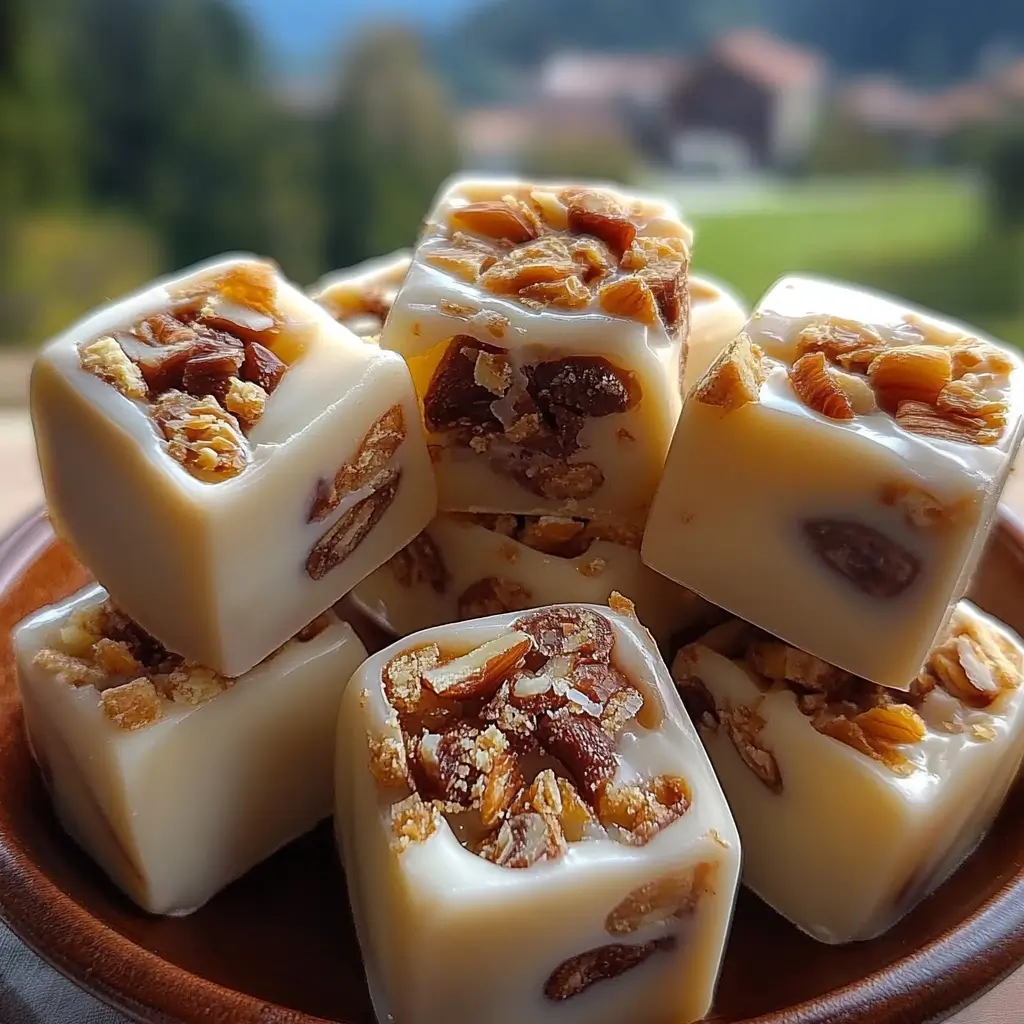
This Pralines and Cream Fudge is the perfect sweet treat for anyone who loves the rich, nutty flavor of pralines combined with the creamy smoothness of white chocolate. It’s an indulgent dessert that will satisfy your sweet tooth and impress your friends and family. The layers of velvety white chocolate fudge and crunchy praline topping create a deliciously satisfying texture and flavor that’s perfect for any occasion, whether it’s a holiday, a party, or just a weekend treat. The beauty of this recipe lies in its simplicity—using just a few ingredients and steps, you can create a fudge that tastes as if you spent hours crafting it in the kitchen.
Why You Will Love This Recipe:
If you’re a fan of creamy, rich, and nutty desserts, you’ll love this Pralines and Cream Fudge. The combination of white chocolate and pecan praline gives it a unique texture, balancing smoothness with a little crunch. This treat is perfect for those who love to indulge in decadent sweets without the hassle of complicated techniques. With minimal cooking time, you get a luscious, melt-in-your-mouth dessert that’s sure to be a hit. Plus, it makes an amazing gift or party favor wrapped up in pretty packaging!
Ingredients:
- 12 ounces white chocolate chips
- 14 ounces sweetened condensed milk
- 1 1/2 cups extra fine granulated sugar
- 1 1/2 cups light brown sugar, packed
- 1/4 teaspoon salt
- 1 cup evaporated milk
- 6 tablespoons unsalted butter
- 1 teaspoon vanilla extract
- 2 cups pecan halves, roughly chopped
Kitchen Equipment Needed:
- Medium saucepan
- Large heavy-bottomed pot
- Candy thermometer
- 9 x 13-inch baking dish
- Rubber spatula
- Measuring spoons and cups
- Wooden spoon or whisk
Instructions:
Step 1: Melt the White Chocolate Start by melting the white chocolate chips and sweetened condensed milk together. Place both ingredients in a medium saucepan over low heat. Stir constantly for about 5–8 minutes until the mixture becomes smooth and fully melted. Make sure you keep the heat low to prevent the chocolate from burning.
Step 2: Prepare the Fudge Base Once the white chocolate is melted, pour the mixture into a greased and lined 9 x 13-inch baking dish. Use a spatula to spread it out evenly, making sure the bottom of the dish is fully covered with the smooth fudge base.
Step 3: Make the Praline Mixture While the white chocolate fudge is setting, you’ll prepare the praline mixture. In a large heavy-bottomed pot, whisk together the granulated sugar, light brown sugar, salt, evaporated milk, and unsalted butter. Place the pot over medium-high heat. Stir the ingredients until the sugars dissolve and the mixture starts to come to a boil.
Step 4: Cook the Praline Mixture Allow the praline mixture to come to a boil, then continue stirring. The key here is to cook the mixture until it reaches 235ºF on a candy thermometer, which is considered the softball stage. This step is crucial for achieving the perfect texture for the praline topping.
Step 5: Cool and Add Vanilla and Pecans Once the praline mixture has reached the correct temperature, remove the pot from the heat. Let it cool for about 5 minutes to allow the mixture to thicken slightly. After the cooling period, add the vanilla extract and chopped pecans, stirring vigorously. Be sure to stir just enough until the mixture starts to lose some of its glossiness and thickens slightly. Avoid overmixing, as it may cause the candy to become grainy or seize up.
Step 6: Assemble the Fudge Now, it’s time to bring everything together! Scoop the praline mixture over the white chocolate fudge, spreading it out to form an even layer on top. Gently use a rubber spatula to push the edges of the fudge toward the center of the pan, which will push some of the white chocolate up over the praline layer. This will create a lovely marbled effect.
Step 7: Final Adjustments Once the praline layer is evenly spread, press the fudge back into an even layer using the spatula. Let the fudge sit at room temperature to cool completely and firm up.
Step 8: Cut and Serve Once the fudge has cooled and set, cut it into 1-inch squares using a sharp knife. You’ll have a beautifully marbled fudge with a creamy, nutty topping that will make your taste buds sing!
Serving and Storage Tips:
- Serving: This fudge is perfect for a quick snack, as a dessert for a gathering, or even as a sweet gift! Serve it on a platter or in cute individual bags for party favors. If you want to make it extra festive, drizzle some melted chocolate over the top for decoration.
- Storage: Store the Pralines and Cream Fudge in an airtight container at room temperature for up to 5 days. For longer storage, refrigerate the fudge for up to 2 weeks. If you want to freeze it, wrap it tightly in plastic wrap and then place it in a freezer-safe bag. It can be frozen for up to 3 months.
Variations:
- Nut-Free Version: If you prefer a nut-free version, you can easily skip the pecans or substitute with other ingredients like chocolate chips or dried fruit, such as cranberries or cherries.
- Dark Chocolate Version: For those who prefer a richer taste, swap out the white chocolate for dark or semi-sweet chocolate. This will result in a less sweet, more intense flavor profile.
- Add Some Spice: For a bit of extra flavor, try adding a pinch of cinnamon or nutmeg to the praline mixture to give it a cozy fall flavor.
Helpful Notes:
- Candy Thermometer: Make sure to use a reliable candy thermometer when making the praline mixture. The temperature is key to getting the right texture. If you don’t have one, you can test the candy by dropping a small amount into a glass of cold water. If it forms a soft ball, it’s ready!
- Stirring: Be gentle when stirring the praline mixture. Stirring too vigorously or for too long can cause the mixture to become too firm and difficult to spread. Let it thicken naturally before adding the pecans.
Tips from Well-Known Chefs:
- Paula Deen: “When making pralines, patience is key. Don’t rush the cooking process. Let the sugar reach the right temperature, and your fudge will turn out perfect every time.”
- Alton Brown: “Keep your candy thermometer in the pot while boiling. It’s easy to get distracted, but precision in candy making is everything.”
Frequently Asked Questions:
1. Can I make this fudge without a candy thermometer? Yes, you can! To check if your praline mixture has reached the right stage, drop a small amount into a glass of cold water. If it forms a soft ball, it’s ready. However, using a candy thermometer makes the process much more reliable.
2. Can I use evaporated milk instead of sweetened condensed milk? No, sweetened condensed milk is much thicker and sweeter than evaporated milk, so it cannot be directly substituted. It plays a key role in creating the creamy texture of the fudge.
3. How do I know when the fudge has cooled completely? The fudge is completely cool when the edges are firm to the touch and the center no longer feels warm. It usually takes about 2–3 hours at room temperature for the fudge to set.
4. Can I add other nuts besides pecans? Absolutely! You can swap the pecans for other nuts like walnuts or almonds. Just make sure to chop them roughly to get the right texture.
5. How can I prevent the fudge from becoming too grainy? The key to avoiding graininess is to stir the praline mixture gently and only until it starts to thicken. Overmixing can cause the sugar to crystallize, resulting in a grainy texture.


