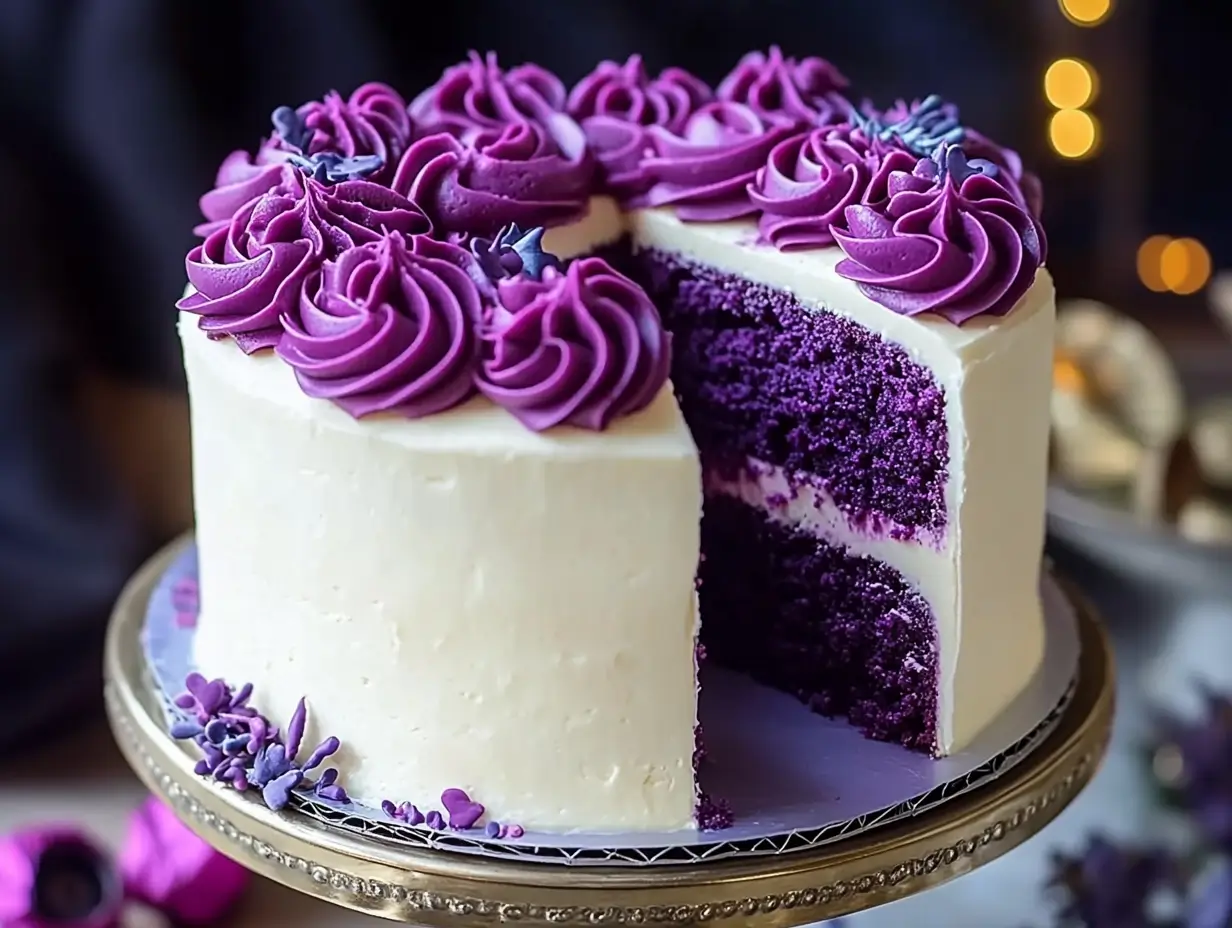
This Royal Purple Velvet Cake is a striking and vibrant twist on the classic red velvet cake. With a tender, cocoa-infused crumb and a luscious cream cheese frosting, it’s sure to be a showstopper at any celebration. The bold purple hue makes it perfect for special occasions or whenever you want to add a bit of drama to your dessert table!
Ingredients:
For the Cake:
- 2 ½ cups all-purpose flour
- 1 ½ cups granulated sugar
- 1 cup buttermilk
- ½ cup softened butter
- 2 large eggs
- 2 tablespoons cocoa powder
- 1 teaspoon vanilla extract
- Purple food coloring (gel or liquid)
- 1 teaspoon baking soda
- 1 teaspoon vinegar
For the Frosting:
- 8 oz cream cheese, softened
- ½ cup butter, softened
- 2 cups powdered sugar
- 1 teaspoon vanilla extract
Directions:
Step 1: Preheat the Oven
Preheat your oven to 350°F (175°C). Grease and flour two 9-inch round cake pans to ensure the cakes release easily after baking.
Step 2: Prepare the Dry Ingredients
In a medium bowl, whisk together the flour and cocoa powder until well combined. Set aside.
Step 3: Cream the Butter and Sugar
In a large mixing bowl, beat the softened butter and granulated sugar together using an electric mixer on medium speed until the mixture is light and fluffy, about 2-3 minutes. Add the eggs one at a time, mixing well after each addition.
Step 4: Add Wet Ingredients
Blend in the buttermilk, purple food coloring (add enough to achieve the desired shade), and vanilla extract. Mix until smooth and evenly colored.
Step 5: Incorporate the Dry Ingredients
Gradually add the dry ingredients to the wet mixture, mixing just until combined. Be careful not to overmix, as this can make the cake dense.
Step 6: Activate the Baking Soda
In a small bowl, stir together the baking soda and vinegar. It will foam up—quickly fold this mixture into the cake batter.
Step 7: Bake the Cakes
Divide the batter evenly between the two prepared cake pans. Smooth the tops with a spatula. Bake in the preheated oven for 25-30 minutes, or until a toothpick inserted into the center comes out clean. Let the cakes cool in the pans for about 10 minutes before turning them out onto a wire rack to cool completely.
Step 8: Make the Cream Cheese Frosting
In a large bowl, beat the softened cream cheese and butter together until smooth and creamy. Gradually add the powdered sugar, one cup at a time, and beat until fluffy. Stir in the vanilla extract.
Step 9: Assemble the Cake
Once the cakes have cooled completely, spread a layer of frosting on top of one cake layer. Place the second cake layer on top and frost the entire cake, including the sides. Decorate as desired, with sprinkles, edible glitter, or extra frosting swirls.
Serving and Storage Tips:
- Serving: This cake is perfect for birthdays, holidays, or any festive occasion. Slice and serve with extra cream cheese frosting on the side if desired.
- Storage: Store the cake in an airtight container in the refrigerator for up to 4 days. Let it come to room temperature before serving for the best texture.
- Freezing: You can freeze the unfrosted cake layers by wrapping them tightly in plastic wrap and placing them in a freezer-safe bag for up to 2 months. Thaw overnight in the refrigerator and frost before serving.
Helpful Notes:
- Food Coloring: Gel food coloring is recommended because it provides a more vibrant color with less liquid. You can add more or less depending on how bold you want the purple hue to be.
- Baking Soda and Vinegar: This step is essential for giving the cake its fluffy texture. The chemical reaction helps the cake rise, so don’t skip it!
Tips from Well-Known Chefs:
- Duff Goldman: “For even cake layers, weigh the batter in each pan before baking. This helps create evenly stacked cakes.”
- Martha Stewart: “To make the frosting even creamier, beat it for an extra minute or two once all the ingredients are combined. It makes a noticeable difference in the texture.”
Frequently Asked Questions:
- Can I use natural food coloring instead of gel?
Yes, but keep in mind that natural food coloring tends to be less vibrant, so you may need to use more to achieve the desired shade of purple. - What can I substitute for buttermilk?
If you don’t have buttermilk, you can make a substitute by adding 1 tablespoon of vinegar or lemon juice to 1 cup of milk. Let it sit for 5 minutes before using. - Can I make this cake gluten-free?
Yes, substitute the all-purpose flour with a 1:1 gluten-free flour blend. The texture may vary slightly, but it should still be delicious! - What can I use instead of cream cheese frosting?
If you prefer, you can use a buttercream or whipped cream frosting. Both pair wonderfully with this cake. - How do I keep the purple color vibrant?
Gel food coloring provides the most vibrant color without altering the texture of the cake. If you’re using liquid food coloring, you may need to use more to achieve the same effect. - Can I make cupcakes with this recipe?
Yes! You can use this batter to make cupcakes. Simply adjust the baking time to about 18-20 minutes, checking for doneness with a toothpick.
This Royal Purple Velvet Cake is as beautiful as it is delicious. With its moist layers, cocoa flavor, and creamy frosting, it’s sure to be a hit at any celebration. Enjoy this stunning dessert!


