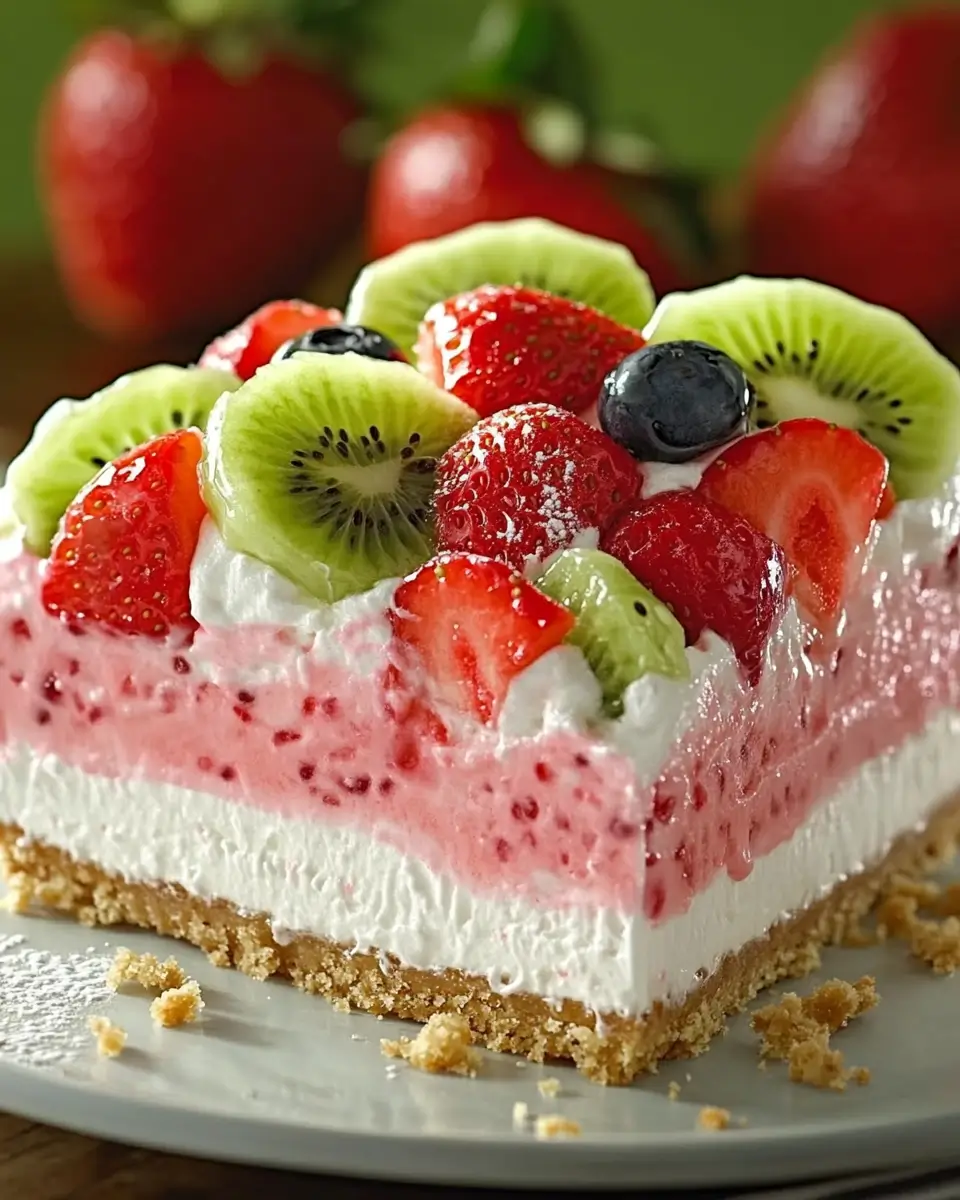
This Strawberry Kiwi Cheesecake Delight is a fruity and refreshing dessert that’s perfect for any occasion. With a graham cracker crust, creamy cheesecake layer, and a light strawberry mousse topped with fresh fruit, it’s a layered treat that will impress guests and satisfy any sweet tooth. The combination of strawberries and kiwi adds a burst of color and flavor, making this dessert as beautiful as it is delicious.
Why You’ll Love This Recipe
- Fruity and Creamy: The strawberries and kiwi provide a fresh, tangy contrast to the creamy cheesecake and mousse layers.
- No-Bake: This cheesecake is easy to make and requires no baking, making it a great dessert to prepare ahead of time.
- Perfect for Spring and Summer: The vibrant colors and fresh flavors make it ideal for warm-weather gatherings.
- Versatile Presentation: This dessert looks gorgeous in a springform pan, and you can garnish it to create a show-stopping centerpiece.
Ingredients
For the Crust
- 1 ½ cups graham cracker crumbs
- ⅓ cup unsalted butter, melted
- ¼ cup sugar
For the Strawberry Kiwi Layer
- 2 cups (16 oz) cream cheese, softened
- ½ cup powdered sugar
- ½ cup strawberry puree
- ½ cup diced kiwi
- 1 teaspoon vanilla extract
For the Strawberry Mousse
- 1 cup strawberries, hulled and pureed
- ½ cup heavy cream
- 2 tablespoons sugar
- 1 teaspoon gelatin, dissolved in 2 tablespoons warm water
For the Topping
- Whipped cream
- Sliced strawberries and kiwi
- Powdered sugar for dusting
Directions
Step 1: Prepare the Crust
In a medium bowl, mix the graham cracker crumbs, melted butter, and sugar until well combined. Press this mixture firmly into the bottom of a springform pan to form an even layer. Chill the crust in the refrigerator for about 30 minutes to set.
Step 2: Make the Strawberry Kiwi Layer
In a large bowl, beat the softened cream cheese with the powdered sugar until smooth and creamy. Stir in the strawberry puree, diced kiwi, and vanilla extract until well incorporated. Spread this mixture over the chilled crust, smoothing the top with a spatula. Return the pan to the refrigerator to allow this layer to set while you prepare the mousse.
Step 3: Prepare the Strawberry Mousse
Blend the strawberry puree with the sugar until well combined. In a separate bowl, whip the heavy cream until soft peaks form. Gently fold the whipped cream into the strawberry puree, then add the dissolved gelatin, stirring until fully incorporated. Pour the mousse over the cheesecake layer and spread evenly.
Step 4: Chill the Cheesecake
Refrigerate the cheesecake for at least 4 hours, or until it’s firm and set. This allows the flavors to meld together and ensures a stable dessert for slicing.
Step 5: Garnish and Serve
Just before serving, top the cheesecake with whipped cream and arrange sliced strawberries and kiwi on top. Dust with powdered sugar for a final touch. Let the cheesecake sit at room temperature for about 10 minutes before slicing to make it easier to cut and serve.
Serving and Storage Tips
- Serving: Serve chilled for the best texture and flavor. For clean slices, wipe the knife between each cut.
- Storage: Cover any leftovers and store them in the refrigerator for up to three days. The flavors continue to develop, so it’s delicious even the next day!
- Freezing: If you want to freeze it, wrap it tightly in plastic wrap, then aluminum foil, and freeze for up to a month. Thaw in the refrigerator before serving.
Helpful Notes
- Fruit Puree Tip: You can make the strawberry puree by blending fresh or thawed frozen strawberries until smooth. Strain if you prefer a seedless puree.
- Extra Brightness: Add a squeeze of lemon juice to the fruit layers for a brighter flavor that enhances the sweetness of the strawberries and kiwi.
- Gelatin Alternative: If you prefer, you can use agar-agar as a vegetarian substitute for the gelatin.
Tips from Well-Known Chefs
- Martha Stewart: “For a creamier texture, let the cream cheese sit at room temperature for at least 30 minutes before mixing. This will help it blend smoothly.”
- Ina Garten: “Fold the whipped cream gently into the fruit puree to keep the mousse light and airy.”
- Giada De Laurentiis: “Use a springform pan for easy release and a clean presentation.”
Frequently Asked Questions
Q1: Can I make this cheesecake without a springform pan?
A1: Yes, you can use a regular pie dish, but a springform pan makes it easier to remove the cheesecake and maintain its shape.
Q2: Can I use frozen strawberries and kiwi?
A2: Yes, frozen fruit works well. Thaw the strawberries and kiwi before using them, and drain any excess liquid.
Q3: How do I dissolve gelatin properly?
A3: Sprinkle gelatin over warm water and let it sit for a few minutes to bloom, then stir until fully dissolved before adding it to the mousse.
Q4: Can I make this dessert without gelatin?
A4: The gelatin helps set the mousse, but you can omit it for a softer texture. Alternatively, use agar-agar as a vegetarian substitute.
Q5: Can I use other fruits instead of strawberries and kiwi?
A5: Absolutely! Mango, raspberry, or blueberry would make delicious substitutes. Adjust the puree and diced fruit quantities as needed.
Q6: Is there a way to make this recipe gluten-free?
A6: Use gluten-free graham crackers for the crust to make the dessert gluten-free.
Q7: How many calories are in each serving?
A7: Each slice contains approximately 390 kcal, depending on the size of the slices.
Q8: Can I add more sugar to the mousse?
A8: Yes, you can adjust the sugar to taste, but remember that the fruit and whipped cream add sweetness as well.
Q9: What if my cheesecake doesn’t set?
A9: Make sure to refrigerate it for the full 4 hours or longer. If the mousse layer is too soft, ensure that the gelatin is fully dissolved before mixing it into the mousse.
Q10: Can I top it with other fruits?
A10: Yes, this cheesecake would be delicious with additional fruits like blueberries, raspberries, or mandarin orange segments.
Enjoy this Strawberry Kiwi Cheesecake Delight for a fresh, fruity, and creamy dessert that’s perfect for special occasions or simply treating yourself. It’s as delicious as it is stunning, and sure to be a crowd-pleaser. Happy baking!

