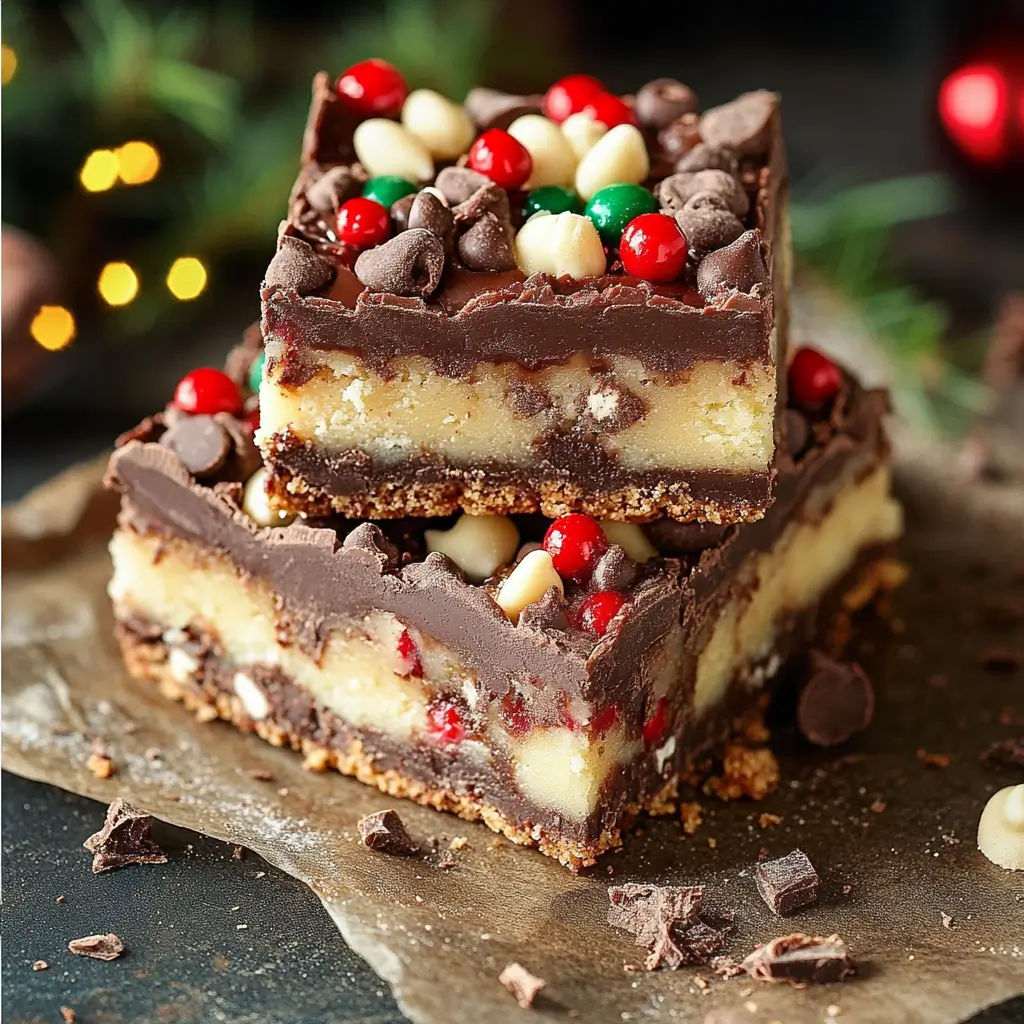
If you’re looking for the perfect dessert to bring holiday cheer to your table, Christmas Chocolate Layer Bars are a must-try. With a buttery almond-infused crust, creamy chocolate filling, and festive red and green M&Ms, these bars are as beautiful as they are delicious. Ideal for parties, cookie exchanges, or simply satisfying your holiday sweet tooth, these bars are a crowd-pleaser that’s surprisingly easy to make.
Why You’ll Love This Recipe
- Festive Appearance: Red and green M&Ms make these bars perfect for Christmas celebrations.
- Rich and Creamy Layers: The creamy chocolate center contrasts beautifully with the crumbly crust.
- Simple Ingredients: No fancy ingredients or hard-to-find items—just classic pantry staples.
- Make-Ahead Friendly: These bars store well, making them ideal for prepping ahead of time.
- Versatile: Customize with your favorite mix-ins like white chocolate chips or pecans.
Ingredients You’ll Need
For the Crust:
- 3 cups all-purpose flour
- 1½ cups granulated sugar
- 1 teaspoon baking powder
- 1 cup (2 sticks) unsalted butter, softened slightly (do not substitute margarine)
- 2 eggs
- 1 teaspoon almond extract
For the Chocolate Filling:
- 12 oz (2 cups) semi-sweet chocolate chips
- 8 oz cream cheese, softened
- 2/3 cup milk
- 1 cup slivered almonds
- 1 cup red and green M&Ms
Kitchen Equipment Needed
- 9×13-inch baking dish
- Electric mixer
- Microwave-safe bowl
- Mixing bowls
- Spatula
- Measuring cups and spoons
Step-by-Step Directions
Step 1: Prepare the Crust
In a mixing bowl, combine the flour, sugar, and baking powder. Cut the butter into small pieces and add it to the bowl. Using an electric mixer on low speed, blend in the almond extract and eggs. The mixture will remain very crumbly—this is exactly what you want. Avoid overmixing, as it can make the crust hard.
Take 2/3 of the crumb mixture and press it lightly into the bottom of a greased 9×13-inch baking dish. Set aside the remaining crumb mixture.
Step 2: Prepare the Chocolate Filling
In a microwave-safe bowl, combine the cream cheese, chocolate chips, and milk. Microwave for 1 minute, pausing to stir after 30 seconds. If not fully melted, continue microwaving in 20-second intervals until smooth. Stir in the slivered almonds.
Step 3: Assemble the Bars
Pour the chocolate filling over the prepared crust, spreading it evenly with a spatula. Sprinkle the remaining crumb mixture evenly over the chocolate layer. Add the red and green M&Ms on top, gently pressing them into the crumb mixture with the palm of your hand.
Step 4: Bake the Bars
Preheat your oven to 350°F (175°C). Bake the bars for 40–45 minutes, or until the edges are lightly golden and the center is set. Remove from the oven and allow the bars to cool completely in the pan.
Step 5: Cut and Serve
Once cooled, cut the bars into small squares. Serve at room temperature or chilled. For best results, store the bars in the refrigerator in an airtight container.
Serving and Storage Tips
- Serving: These bars are perfect as part of a holiday dessert platter or served with coffee or hot cocoa.
- Storage: Store in an airtight container in the refrigerator for up to 5 days. For longer storage, freeze for up to 3 months and thaw in the refrigerator before serving.
Variations
- Nut-Free Option: Omit the slivered almonds or substitute with shredded coconut for added texture.
- White Chocolate Swap: Use white chocolate chips in the filling for a sweeter, creamier twist.
- Holiday Sprinkles: Swap the M&Ms for red and green sprinkles to match your festive theme.
- Extra Crunch: Add crushed candy canes or pretzel pieces for a fun and crunchy topping.
Helpful Notes
- Use softened butter for the crust—cold butter will make the mixture harder to work with.
- Press the crumb mixture lightly into the pan to avoid a dense crust.
- Allow the bars to cool completely before cutting to ensure clean edges.
Tips from Well-Known Chefs
- Ina Garten: “Always use high-quality chocolate chips for a richer, smoother filling.”
- Mary Berry: “Adding a pinch of salt to your crust will enhance the overall flavor of the bars.”
- Ree Drummond: “For easy removal, line the baking dish with parchment paper, leaving an overhang to lift the bars out after cooling.”
Frequently Asked Questions
1. Can I make these bars ahead of time?
Yes! These bars taste great when made a day in advance. Store them in the refrigerator until ready to serve.
2. Can I substitute margarine for butter in the crust?
No, butter is essential for the proper texture and flavor of the crust. Margarine may result in a greasy or overly soft crust.
3. Can I use dark chocolate instead of semi-sweet?
Absolutely! Dark chocolate adds a richer flavor to the filling.
4. How do I ensure the crust doesn’t become hard?
Avoid overmixing the crust ingredients. The mixture should remain crumbly when pressed into the pan.
5. Can I freeze these bars?
Yes, wrap the cooled bars tightly in plastic wrap and place them in an airtight container or freezer bag. Freeze for up to 3 months and thaw in the refrigerator before serving.
These Christmas Chocolate Layer Bars are a festive, flavorful, and easy-to-make treat that’s sure to become a holiday favorite. Whether you’re sharing them with loved ones or keeping a stash for yourself, they’re the perfect addition to your Christmas baking tradition!


