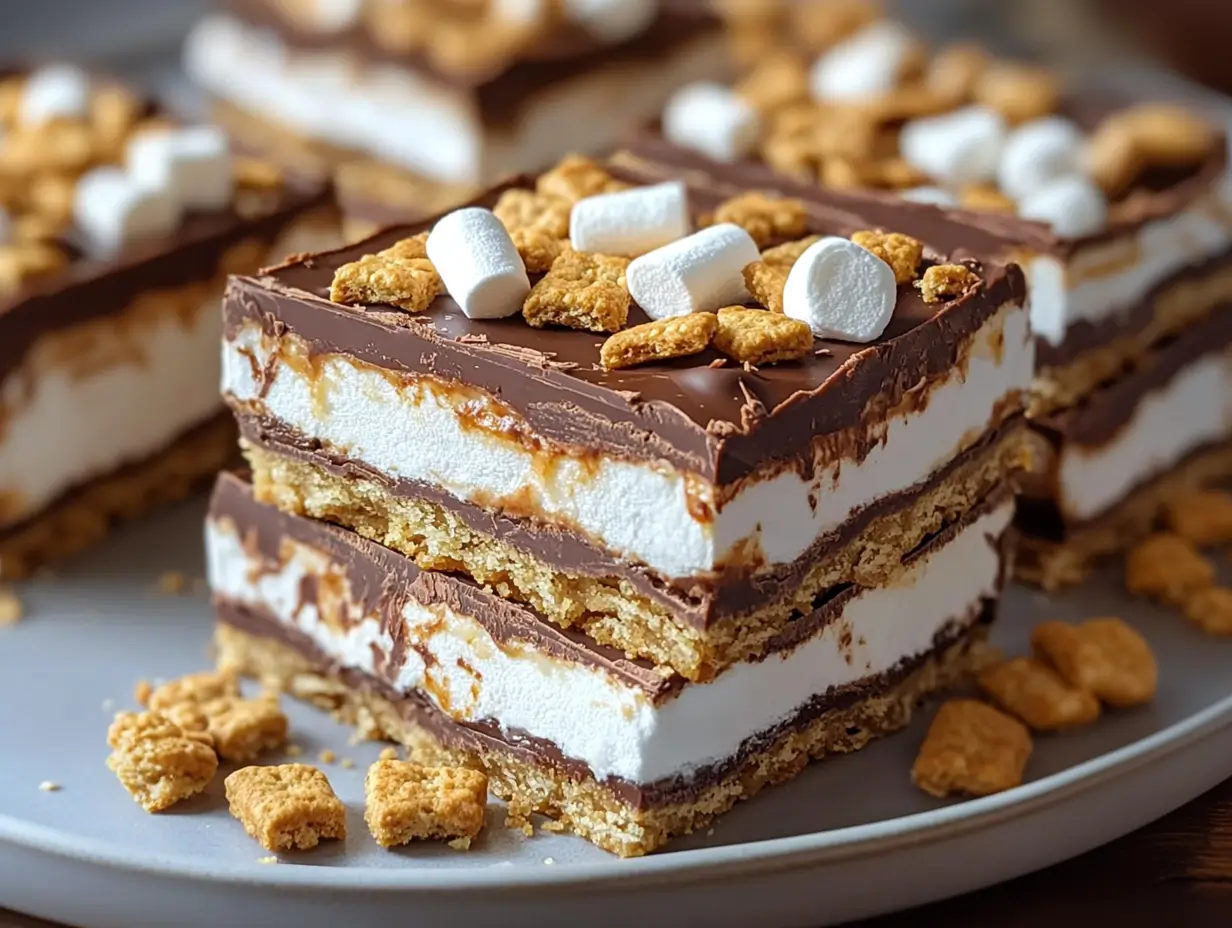
Nothing captures the essence of campfire nostalgia quite like s’mores. These Gooey S’mores Chocolate Bars take that classic flavor and turn it into a delicious, easy-to-make dessert bar. With a buttery graham cracker crust, rich layers of semi-sweet chocolate, and gooey toasted marshmallows on top, these bars are the perfect combination of sweet, crispy, and melty. Best of all, you can enjoy these treats without the need for a campfire!
Here’s how to create this decadent treat step-by-step.
Ingredients:
- 1/2 cup unsalted butter, melted
- 1 1/2 cups graham cracker crumbs
- 1/4 cup granulated sugar
- 1/2 teaspoon salt
- 2 cups semi-sweet chocolate chips
- 1 1/2 cups mini marshmallows
Directions:
Step 1: Prepare Your Pan
Preheat your oven to 350°F (175°C). Lightly grease a 9×9-inch baking pan to prevent the bars from sticking. You can also line the pan with parchment paper for easy removal later.
Step 2: Mix the Base
In a medium bowl, combine the melted butter, graham cracker crumbs, granulated sugar, and salt. Stir until the mixture is evenly moistened, and the graham cracker crumbs have absorbed the butter completely. This forms the base of your s’mores bars.
Step 3: Create the Crust
Press the graham cracker mixture firmly into the bottom of the prepared pan. Use your hands or the back of a spoon to create an even, solid layer. This will be the crunchy base that supports the gooey layers of chocolate and marshmallow.
Step 4: Add the Chocolate
Evenly sprinkle the semi-sweet chocolate chips over the graham cracker crust. Spread them out so that every bite will be filled with rich, melted chocolate.
Step 5: Layer the Marshmallows
Cover the chocolate layer with mini marshmallows, spreading them evenly across the top. The marshmallows will puff up and turn golden in the oven, giving the bars their signature s’mores look and taste.
Step 6: Bake to Perfection
Place the pan in the preheated oven and bake for 25-30 minutes, or until the marshmallows are beautifully golden brown and the chocolate has melted into a smooth, gooey layer. Keep an eye on the marshmallows to ensure they don’t burn—lightly browned is perfect.
Step 7: Cool and Serve
Once baked, remove the pan from the oven and let the bars cool completely on a wire rack. This cooling step is essential to help the layers set, making it easier to slice the bars cleanly. Once cooled, cut into squares and serve.
Serving and Storage Tips:
- Serving: These bars are best enjoyed once cooled, allowing the layers to set. However, if you prefer a gooier experience, serve them slightly warm with a fork. You can even pair them with a scoop of vanilla ice cream for an indulgent dessert.
- Storage: Store the s’mores bars in an airtight container at room temperature for up to 3 days. If you want them to last longer, you can refrigerate them for up to 5 days. To enjoy warm, gooey bars again, pop them in the microwave for 10-15 seconds before serving.
- Freezing: These bars can also be frozen! Wrap individual bars in plastic wrap, then store in a freezer-safe bag for up to 2 months. Thaw at room temperature or microwave for a quick treat.
Helpful Notes:
- Chocolate Options: Semi-sweet chocolate chips work perfectly for balancing the sweetness of the marshmallows, but you can experiment with dark chocolate for a richer flavor or milk chocolate for a sweeter taste.
- Graham Cracker Crumbs: If you don’t have pre-made graham cracker crumbs, you can crush whole graham crackers in a food processor or in a sealed plastic bag using a rolling pin.
- Marshmallow Substitutes: If you prefer larger marshmallows, you can use regular-sized marshmallows cut into smaller pieces, or try flavored marshmallows for a fun twist.
Tips from Well-Known Chefs:
- Sally McKenney (Sally’s Baking Addiction) suggests using slightly browned butter for the crust to add a nutty, caramelized depth of flavor.
- Christina Tosi of Milk Bar recommends adding a sprinkle of sea salt on top of the bars just before baking. This adds a sophisticated salty-sweet contrast to the gooey goodness.
- Ree Drummond (The Pioneer Woman) suggests adding a layer of peanut butter or Nutella between the chocolate chips and marshmallows for an extra indulgent twist.
Frequently Asked Questions (FAQs):
1. Can I use milk chocolate instead of semi-sweet?
Yes! If you prefer a sweeter bar, you can substitute the semi-sweet chocolate chips with milk chocolate chips. Keep in mind that the bars will be much sweeter.
2. How do I prevent the marshmallows from burning?
To avoid burning the marshmallows, keep a close eye on them during the last few minutes of baking. Once they turn golden brown, remove the pan from the oven immediately. You can also tent the pan with foil if you notice the marshmallows browning too quickly.
3. Can I add other toppings to these s’mores bars?
Definitely! For a fun twist, try adding crushed nuts, toffee bits, or a drizzle of caramel sauce on top of the marshmallows before baking.
4. Can I make this recipe gluten-free?
Yes, simply use gluten-free graham crackers for the crust, and ensure all other ingredients (such as chocolate chips) are gluten-free.
5. What can I use if I don’t have graham cracker crumbs?
If you don’t have graham cracker crumbs, you can substitute with digestive biscuits or crushed shortbread cookies for a similar texture and flavor.
6. Can I make these bars ahead of time?
Yes! You can make the bars a day ahead. Just cover and store them at room temperature, and they’ll be ready to serve the next day.
7. How do I know when the bars are done?
The bars are done when the marshmallows are golden brown, and the chocolate has melted underneath. You can insert a toothpick into the middle to check if the crust is baked through.
8. Can I use homemade marshmallows for this recipe?
Yes, homemade marshmallows can be used! Just cut them into small pieces and layer them as you would with store-bought marshmallows.
9. Why is my crust crumbling when I cut the bars?
Make sure to press the graham cracker crust firmly into the pan before baking. Also, allowing the bars to cool completely will help the crust stay intact when slicing.
10. How do I keep the bars from sticking to the pan?
Greasing the pan or lining it with parchment paper will prevent the bars from sticking. Parchment paper also makes it easier to lift the bars out of the pan for cutting.
These Gooey S’mores Chocolate Bars bring the campfire favorite into your kitchen with rich layers of chocolate, toasted marshmallows, and a buttery graham cracker crust. They’re perfect for parties, potlucks, or just satisfying your sweet tooth at home. Enjoy!


