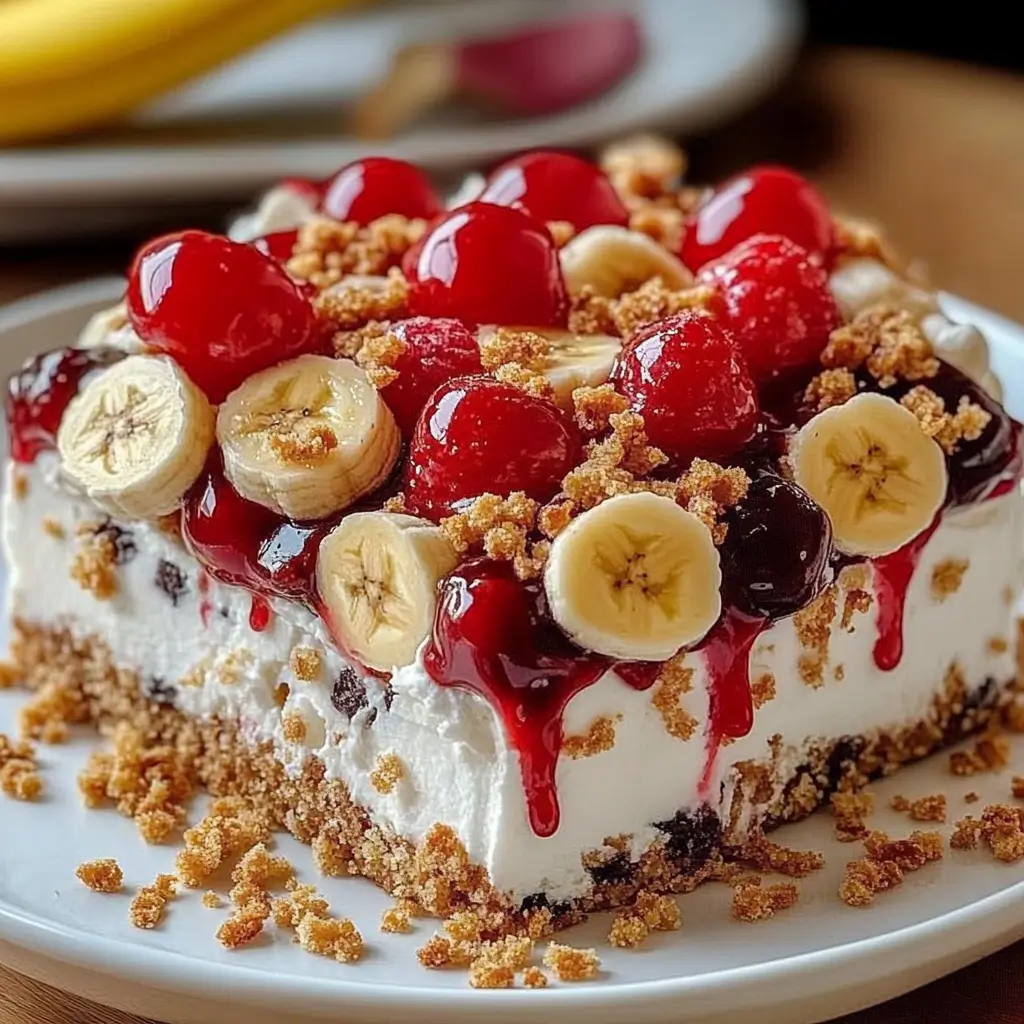
This No-Bake Banana Split Cake is a layered dessert that captures the flavors of a classic banana split in every creamy, fruity bite. With layers of graham cracker crust, creamy filling, fresh fruit, and indulgent toppings, this dessert is a show-stopper that’s perfect for summer gatherings, potlucks, or any occasion where you want a sweet treat without turning on the oven.
Why You’ll Love This Recipe
- No-Bake Convenience: Perfect for warm days when you don’t want to use the oven.
- Layered Flavor: Each layer adds its own unique texture and flavor, from the creamy filling to the fresh fruit and crunchy nuts.
- Simple Ingredients: Made with easy-to-find ingredients that come together quickly.
- Crowd-Pleaser: This dessert is sure to be a hit with both kids and adults.
Ingredients
- 2 cups graham cracker crumbs
- 1/2 cup unsalted butter, melted
- 8 oz cream cheese, softened
- 1/4 cup granulated sugar
- 4 cups whipped topping (Cool Whip), divided
- 4-5 bananas, sliced
- 1 (20 oz) can crushed pineapple, drained
- 1 (21 oz) can cherry pie filling
- 1/2 cup chopped walnuts or pecans
- Chocolate syrup, for drizzling
- Maraschino cherries, for garnish
Step-by-Step Instructions
Step 1: Prepare the Crust
- In a medium bowl, mix the graham cracker crumbs with the melted butter until well combined.
- Press the mixture firmly into the bottom of a 9×13-inch pan to create an even crust layer.
Step 2: Cream Cheese Layer
- In another bowl, beat the softened cream cheese with granulated sugar until smooth and creamy.
- Fold in 2 cups of the whipped topping until fully incorporated.
- Spread this cream cheese mixture evenly over the graham cracker crust.
Step 3: Layer the Fruit
- Arrange the sliced bananas over the cream cheese layer.
- Next, spread an even layer of the drained crushed pineapple over the bananas.
Step 4: Whipped Topping Layer
- Spread the remaining 2 cups of whipped topping evenly over the pineapple layer.
Step 5: Add Toppings
- Spoon the cherry pie filling over the whipped topping layer, spreading it evenly.
- Sprinkle the chopped nuts over the top, drizzle with chocolate syrup, and garnish with maraschino cherries.
Step 6: Chill and Serve
- Cover the dessert and refrigerate for at least 4 hours, or preferably overnight, to allow the layers to set. Serve chilled for the best flavor and texture.
Kitchen Equipment Needed
- 9×13-inch pan for assembling layers
- Mixing bowls for different layers
- Spatula for spreading layers evenly
- Knife for slicing bananas
- Spoon for spreading and drizzling toppings
Serving and Storage Tips
- Serving: This dessert is best served chilled. Cut into squares and serve as-is, or add an extra drizzle of chocolate syrup before serving.
- Storage: Store any leftovers in an airtight container in the refrigerator for up to 3 days.
- Make-Ahead: This is a great make-ahead dessert, as the flavors meld and the texture improves after a few hours of chilling.
Variations
- Chocolate Graham Crust: Swap regular graham crackers for chocolate graham crackers for an extra layer of chocolate flavor.
- Extra Fruit: Add a layer of strawberries or blueberries for a fresh twist.
- Gluten-Free Option: Use gluten-free graham cracker crumbs to make this dessert gluten-free.
- Nut-Free Version: Omit the nuts or substitute with crushed graham cracker crumbs for a bit of crunch.
Helpful Tips
- Prevent Browning: To keep the bananas fresh, brush them lightly with lemon juice before layering to prevent browning.
- Drain Pineapple Well: Make sure the pineapple is well-drained to avoid excess liquid that could make the dessert soggy.
- Slicing: For cleaner slices, use a sharp knife and wipe it clean between cuts.
Frequently Asked Questions
1. Can I use fresh whipped cream instead of Cool Whip?
Yes, homemade whipped cream works well, but be sure to whip it to stiff peaks so it holds its shape.
2. Can I use other fruits in this dessert?
Absolutely! Fresh strawberries, blueberries, or mango slices would add great flavor.
3. Can I freeze this dessert?
Freezing is not recommended due to the whipped topping and fresh bananas, which can lose their texture after freezing.
4. How can I make this dessert lighter?
Use light cream cheese and light whipped topping to reduce calories and fat without sacrificing flavor.
5. Can I make this in individual servings?
Yes, layer the ingredients in small mason jars or cups for single-serving banana split parfaits.
This No-Bake Banana Split Cake is a delightful, easy-to-make dessert with layers of creamy filling, sweet fruit, and crunchy toppings. Perfect for parties, potlucks, or any occasion, it’s a crowd-pleasing treat that’s sure to disappear quickly!
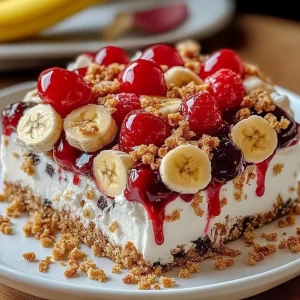
No-Bake Banana Split Cake Recipe
Ingredients
- 2 cups graham cracker crumbs
- 1/2 cup unsalted butter melted
- 8 oz cream cheese softened
- 1/4 cup granulated sugar
- 4 cups whipped topping Cool Whip, divided
- 4-5 bananas sliced
- 1 20 oz can crushed pineapple, drained
- 1 21 oz can cherry pie filling
- 1/2 cup chopped walnuts or pecans
- Chocolate syrup for drizzling
- Maraschino cherries for garnish
Instructions
- Prepare the Crust: In a medium bowl, mix the graham cracker crumbs with melted butter until well combined. Press the mixture firmly into the bottom of a 9×13-inch pan to form the crust.
- Cream Cheese Layer: In another bowl, beat the softened cream cheese with granulated sugar until smooth and creamy. Fold in 2 cups of the whipped topping until well combined. Spread this mixture evenly over the graham cracker crust.
- Layer the Fruit: Arrange the sliced bananas over the cream cheese layer, followed by an even layer of drained crushed pineapple.
- Whipped Topping Layer: Spread the remaining 2 cups of whipped topping evenly over the pineapple layer.
- Add Toppings: Spoon the cherry pie filling over the whipped topping, spreading it evenly. Sprinkle chopped nuts over the top, drizzle with chocolate syrup, and add maraschino cherries as garnish.
- Chill and Serve: Cover the dessert and refrigerate for at least 4 hours or overnight to allow the layers to set. Serve chilled.
Notes
- Prevent Browning: To keep the bananas fresh, brush them lightly with lemon juice before layering to prevent browning.
- Drain Pineapple Well: Make sure the pineapple is well-drained to avoid excess liquid that could make the dessert soggy.
- Slicing: For cleaner slices, use a sharp knife and wipe it clean between cuts.

